How to Fix the ‘Your Startup Disk Is Almost Full’ Error on Mac
The message Your startup disk is almost full on your Mac indicates that your disk is running out of storage space. This error alerts the user that the accumulation of files and data on your drive has exceeded the recommended limit set by macOS.
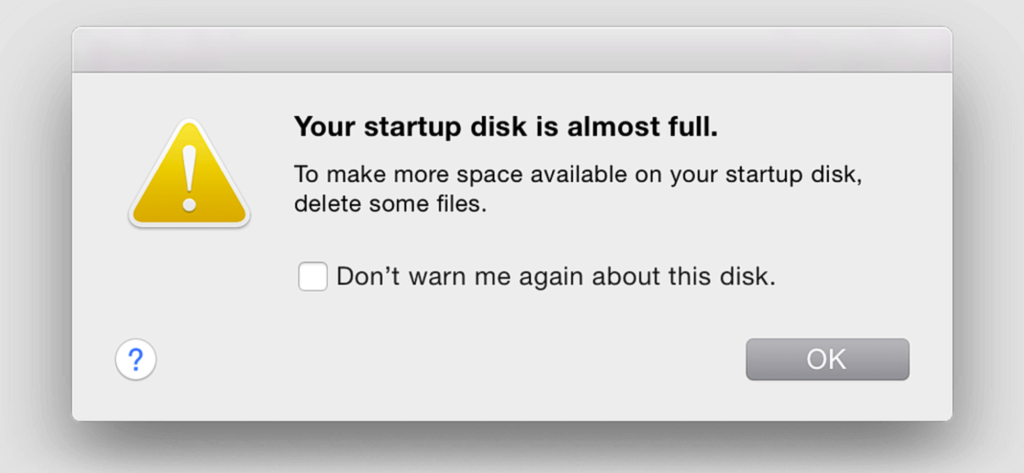
A startup disk, where macOS is installed, requires adequate free space for optimal operation. Insufficient space can lead to potential issues impairing device operations, storage capabilities, and application performance.
To ensure proper functionality, at least 10% of your startup disk should be free. Therefore, upon receiving this message, it is imperative to free up storage space immediately to prevent further issues.
Check Your Disk Space
Before proceeding with a remedy, first assess how much storage your Mac is using and how much is available. This will help you determine the amount of space you need to free and prioritize the most critical cleanup steps.
- Click on the Apple menu.
- Select About This Mac.
- Click on the Storage tab where you can view your device’s storage.
1. Optimize Storage Space
Optimizing Mac storage can not only help clear space on the startup disk but also improve system speed. It is particularly advisable when the message indicates that your device is lagging in performance.
Mac provides several recommendations for optimizing space, like moving data to iCloud, emptying the Trash folder regularly, or having the system automatically remove watched movies and TV shows.
- Click on the Apple logo.
- Select About This Mac.
- Go to the Storage tab.
- Click on the Manage button.

- Choose an optimization method that suits your needs.
2. Clean Cache Files
Your Mac generates cache files, temporary files, and backups for optimal operation, yet over time these files become redundant and consume space. Removing them, while seemingly complicated, is relatively straightforward and helps prevent file corruption and system inefficiencies.
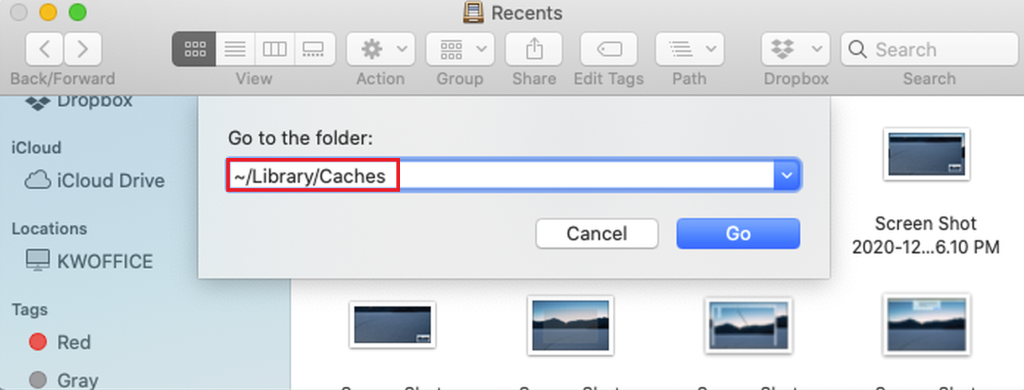
- Open Finder.
- Select Go from the menu bar.
- Choose Go to Folder.
- Type the following path and click on Go:
~/Library/Caches
- Delete unnecessary files within each folder.
Note that manually deleting files carries some risk of accidentally removing important data. Consider using a reputable third-party cleaning tool.
3. Remove the Trash Items
Deleted files are relocated to the Trash and compressed, not immediately removed, allowing for potential recovery. Over time, the Trash can accumulate and use unnecessary disk space.
- Hold the Ctrl key and simultaneously click on the Trash icon in the Dock.
- Choose Empty Trash.
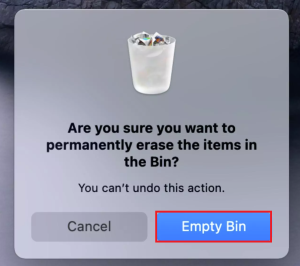
- Confirm by clicking on the Empty Trash button.
4. Clean Your Desktop
A cluttered desktop can consume excessive resources as it refreshes to display the latest updates. Utilizing the Stacks feature, which groups files by type or creation date, can help manage desktop clutter and improve performance.
- Hold the Command key and click anywhere on the desktop.
- Choose Use Stacks.
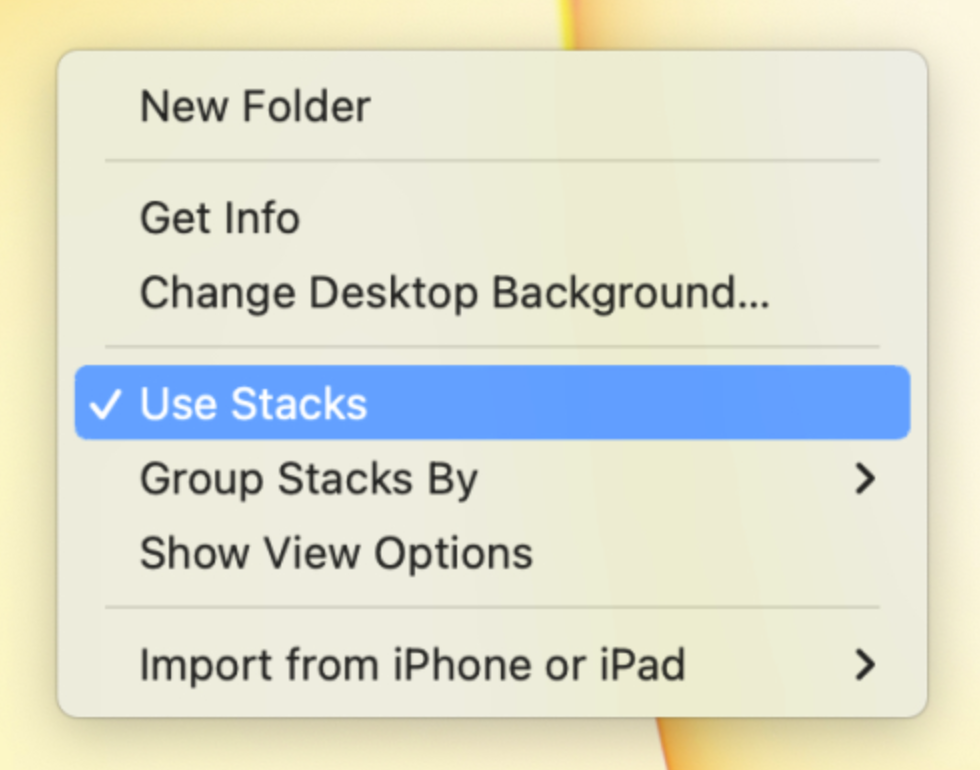
- Move any superfluous folders to the Trash.
5. Remove Unwanted Apps
Unnecessary applications occupy precious disk space. Review the apps installed on your Mac and uninstall those you no longer use.
- Open the Finder app.
- Click on Go and choose Applications.
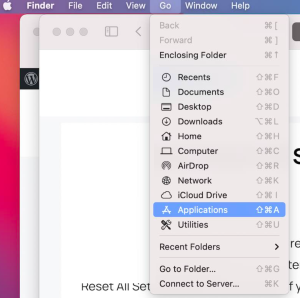
- Drag apps you don’t use to the Trash.
6. Clean up the Photo Library
Pictures from iOS devices can accumulate on your Mac via iCloud, leading to redundant duplicates consuming storage on both devices. Consider deleting unneeded photos or using third-party software to detect duplicates. Alternatively, transfer photos to an external drive.
- Connect your Mac to an external drive.
- Open Finder.
- Select files to transfer and drag them to the designated drive under Locations in the sidebar.
7. Delete iOS Backup Files
Old iOS device backups on your Mac can take up considerable space. Regularly deleting outdated backups will free up storage on your startup disk.
- Click the Apple menu.
- Select System Settings.
- Choose General.
- Navigate to Storage.
- Click on the info icon next to iOS Files.
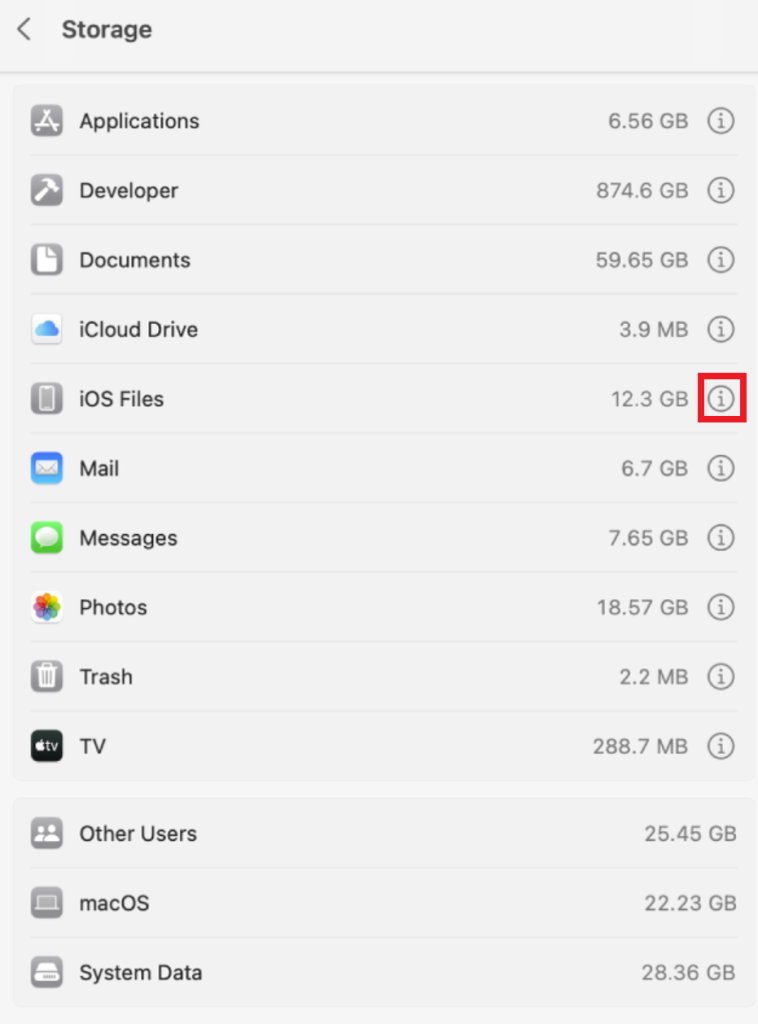
- Select the unnecessary backups and click Delete.


