How to Change WiFi Network’s Name and Password?
Most of the time the default name for the Wireless Network will be related to the Router or the ISP. The network’s name is used to identify the network that users want to connect to. If there are two of the same kind routers and both have the default SSID, then the network name for both will be the same. In addition, unknown users can guess the default password easily. There are also many other reasons where the user will want to change the name and password for their WiFi network. We will teach you the steps through which you can easily change the name and password of your network.
Changing WiFi Network’s Name and Password
Changing the SSID and password of your wireless network is simple to do in the router settings. There are many kinds of router/modem devices, each with different settings. However, mostly the settings will look alike or that will be available in the same area. Through the WiFi name, users can find the network that they want to connect to, and with a password, you will have security over your network. Sometimes if you hide the access point, then the users will require to manually add the WiFi name and password to connect to the network. Follow the below steps to change the name and password of the WiFi network:
- Open your browser and type the IP address of your Router. You can find the IP address on the back of the router or by opening CMD and typing ‘ipconfig‘ as shown below:

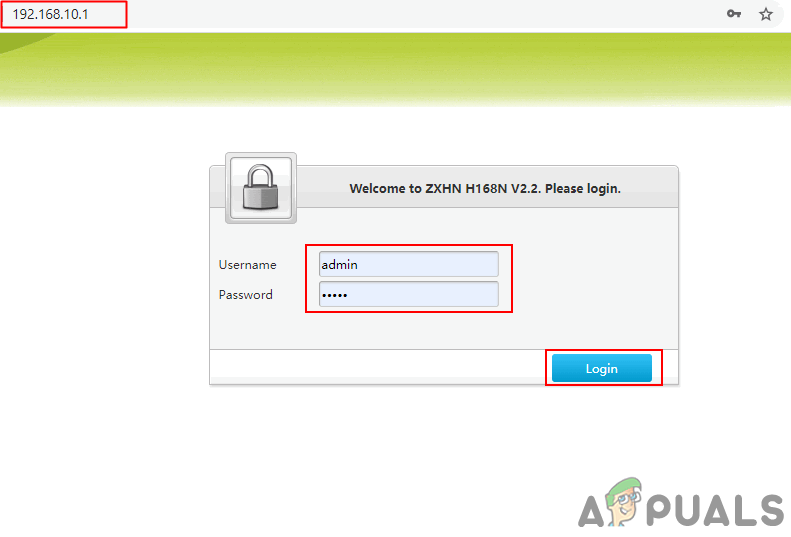
Finding the IP address of a router - Now log in to your router settings. The default username/password will be admin/admin. However, you may have a different password that you can find on the back of the router.
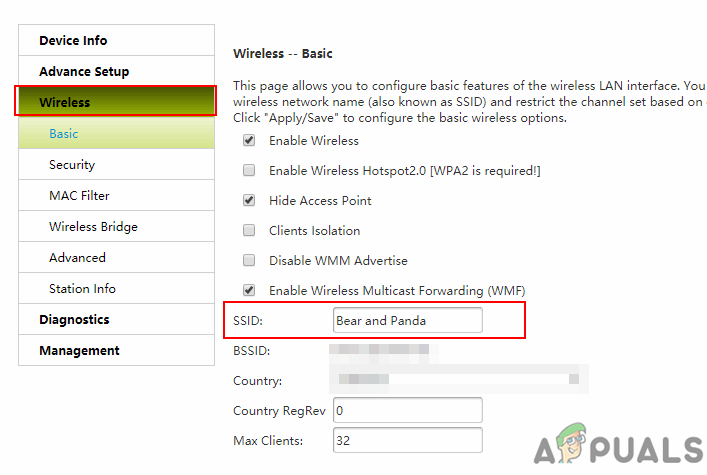
Logging in to the router page - In the router settings, click on the Wireless or Wireless Settings option. Here you will find the SSID option where you can edit the WiFi name of your network.
Changing the Wireless Network Name - To change the password, go to the Security option for Wireless settings. Type the new password that you prefer and click on the Apply/Save button.
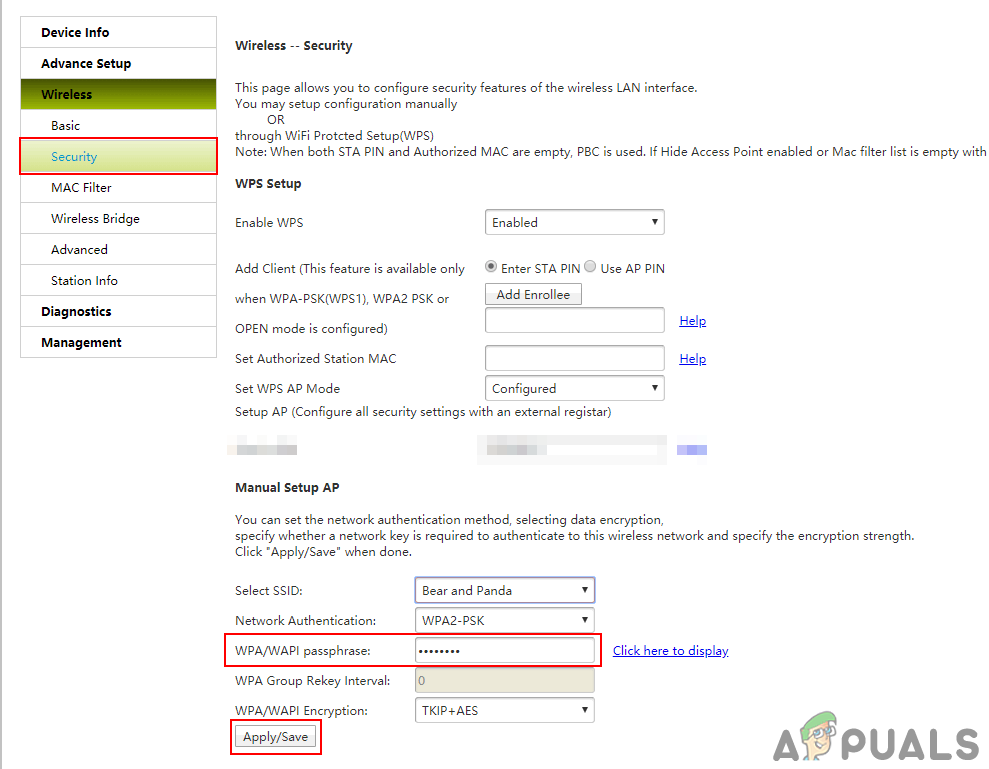
Changing the Password of WiFi - This will change the WiFi name and password for your network.


