How to Enable or Disable Automatic Updates for Windows Media Player?
Application updates are always provided to help in patching security flaws and improving stability. The Windows Media Player has a feature that periodically checks for the latest updates. Even if you are not using the Windows Media Player, some components that run Windows Media Player are used by other programs on the system. However, not every user would want this feature enabled for their Windows Media Player. In this article, we will provide you with the methods that can help you in enabling or disabling the automatic updates for Windows Media Player.
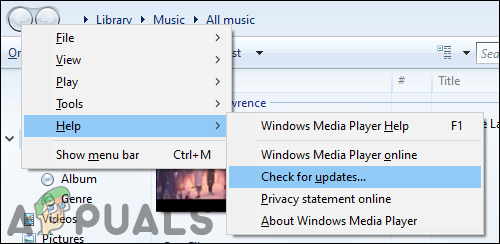
Stopping Windows Media Player from Periodically Checking for Updates
By default, this feature will be enabled on your system and that is why we will be focusing on disabling it in this article. There are several different reasons for stopping the automatic updates for the Windows Media Player. Some users have limited internet and others want to update the applications manually. The automatic updates for Windows Media Player can be stopped by using the Group Policy setting.
However, the Group Policy Editor isn’t available for Windows Home editions. That is why we are also including the Registry Editor method for the Windows Home users. Both do the same job of enabling and disabling the automatic updates for Windows Media Player.
Method 1: Using the Local Group Policy Editor
The Group Policy Editor is an administration tool that helps in configuring many important settings of the operating system. There is a specific policy setting through which you can enable or disable the automatic updates for Windows Media Player. This setting can only be found in the Computer Configuration category of the Group Policy. Follow the below steps to enable or disable this setting:
- First, open a Run dialog by pressing the Windows + R keys combination on your keyboard. Now type “gpedit.msc” in the box and press the Enter key to open the Local Group Policy Editor.
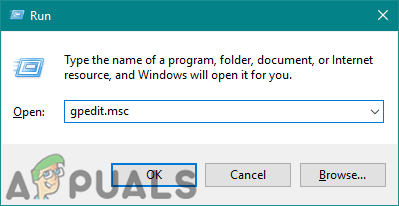
Opening the Local Group Policy Editor - In the Computer Configuration category, navigate to the following setting:
Computer Configuration\ Administrative Templates\ Windows Components\ Windows Media Player\
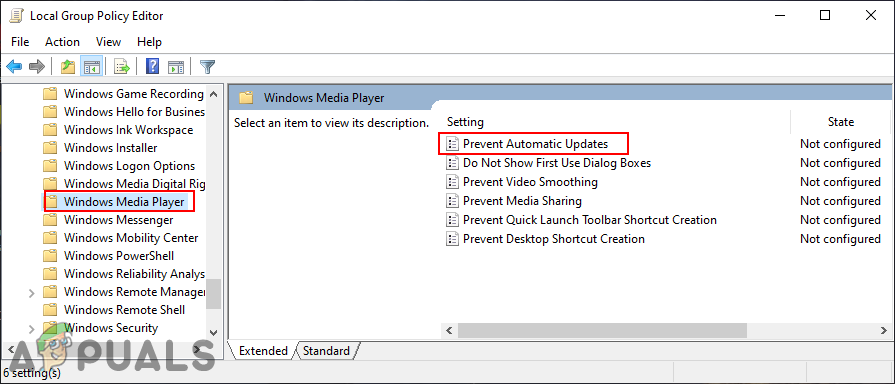
Navigating to the setting - Open a setting named “Prevent Automatic Updates” by double-clicking on it. This will open the setting in another window and then change the toggle option to Enabled.
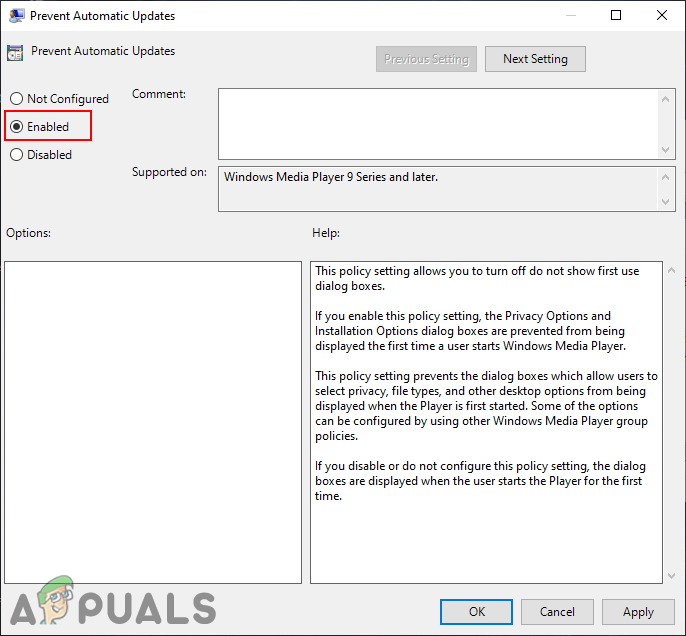
Enabling the setting - Now click on the Apply/Ok button to save the changes. This will disable the automatic checking for updates in Windows Media Player.
- You can always revert this back by navigating to the same setting and changing the toggle option back to Not Configured.
Method 2: Using the Registry Editor
The Windows Registry Editor is another tool that administrators can use to modify the low-level settings for their operating system. It contains all the information that Windows continually references during operations. However, incorrect modification in the Registry can cause serious problems. Therefore, we always recommend users to follow the steps carefully and create a backup of their Registry before making any new changes.
- First, open up a Run dialog box by pressing the Windows and R keys together. Then type “regedit” and press the Enter key to open the Registry Editor. Click on the Yes button for the UAC (User Account Control) prompt.
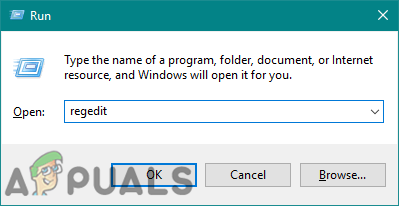
Opening the Registry Editor - In the Local Machine hive, navigate to the following key:
HKEY_LOCAL_MACHINE\Software\Policies\Microsoft\WindowsMediaPlayer
- In the WindowsMediaPlayer key right-click on the right pane and choose the New > DWORD (32-bit) Value option. Name this value as “DisableAutoUpdate“.
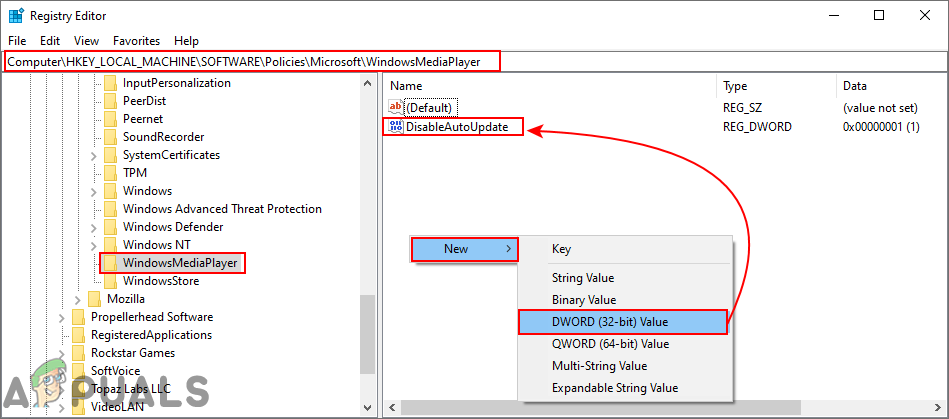
Creating a new value - Open this value by double-clicking on it and change the value data to 1 to enable it.
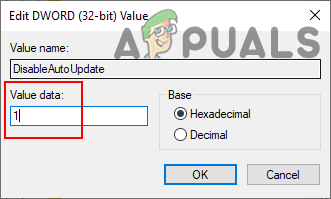
Changing the value data - Finally, you need to restart your system to apply these changes. This will disable the auto-update for Windows Media Player.
- You can always revert back these changes by simply changing the value data to 0 or removing the value from the Registry.
