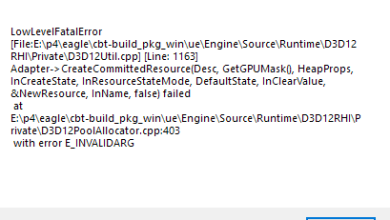
How to Fix “DirectX Error” in Baldur’s Gate 3
The DirectX error in Baldur’s Gate 3 mainly occurs when the video card drivers on your PC are not up to date. This is a common occurrence with most modern games where old drivers cause various compatibility issues with newer games.
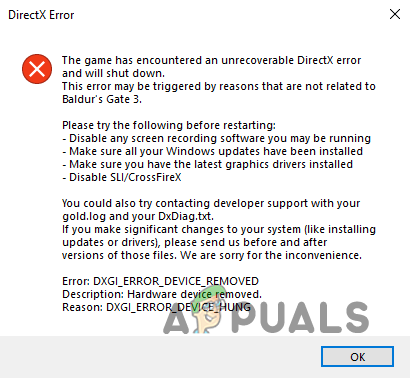
In these instances, updating the graphics drivers on your machine is the most essential step. This is because GPU manufacturers push out new updates to offer better support for newer games on their cards. We will look at a number of solutions for the DirectX error in Baldur’s Gate 3 that you can follow on your PC to overcome the problem.
1. Change Video Settings
The first thing you should do to troubleshoot the DirectX error in Baldur’s Gate 3 is to change the video settings on your system. The DirectX error can usually be related to your graphics settings. This can happen when the PC lacks the resources to render the selected quality presets and resolution.
In addition, even if you have a high-end PC, we recommend going through with this solution as it can also help circumvent the issue in your case. As it happens, the problem can also arise due to an inconsistency with the game on higher resolutions and frames, causing it to crash. Such problems are patched by the developer team in subsequent updates, so you will have to make do till then.
Follow the instructions below to make the recommended changes:
- First, open the game on your PC.
- After that, use the menu to open the Options screen.
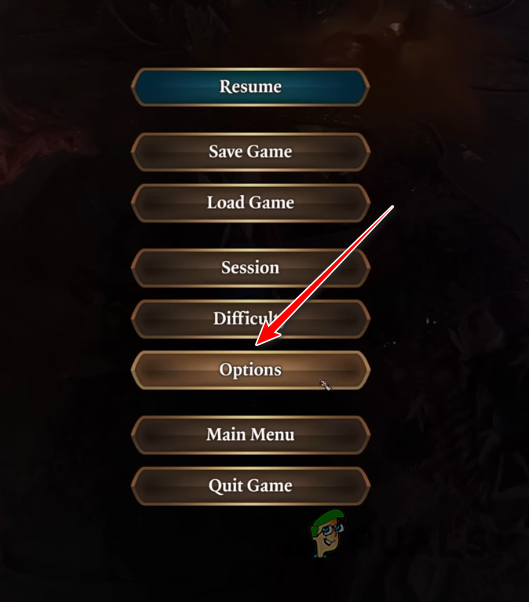
Navigating to Options - Then, switch to the Video tab.
- Start by ensuring the game is utilizing the correct GPU via the Display Adapter option.
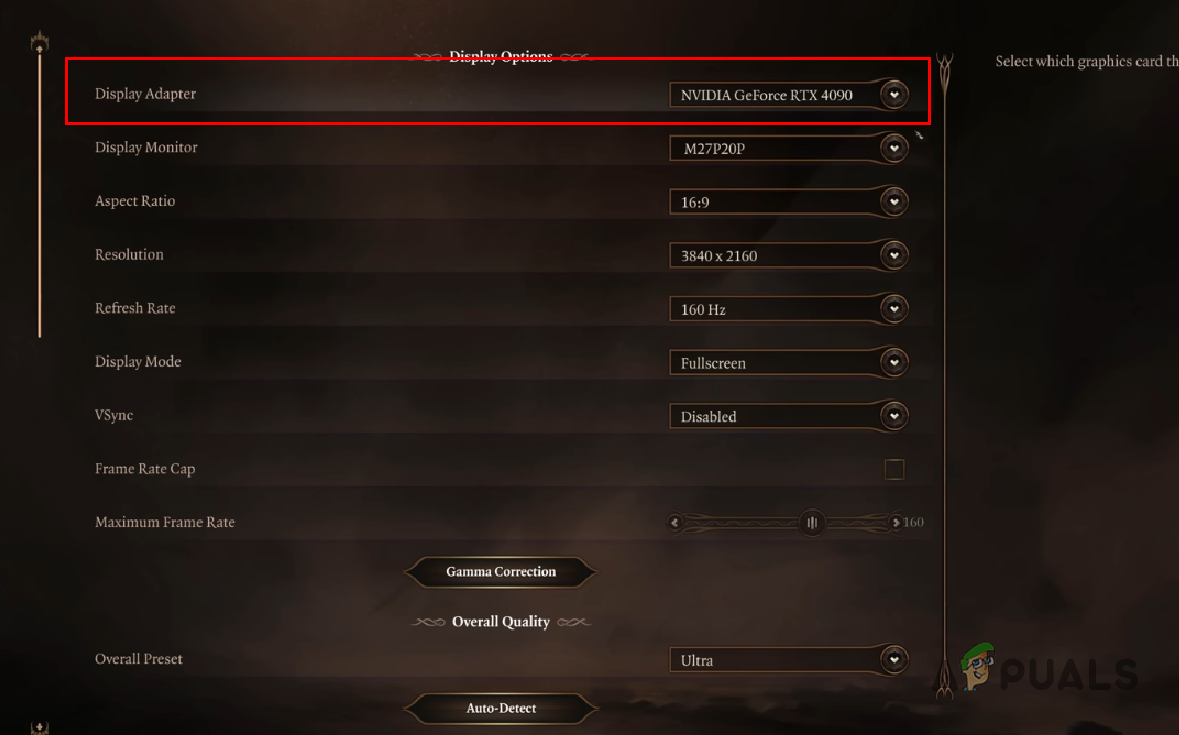
Checking Display Adapter - After that, select the Fullscreen option as Display Mode.
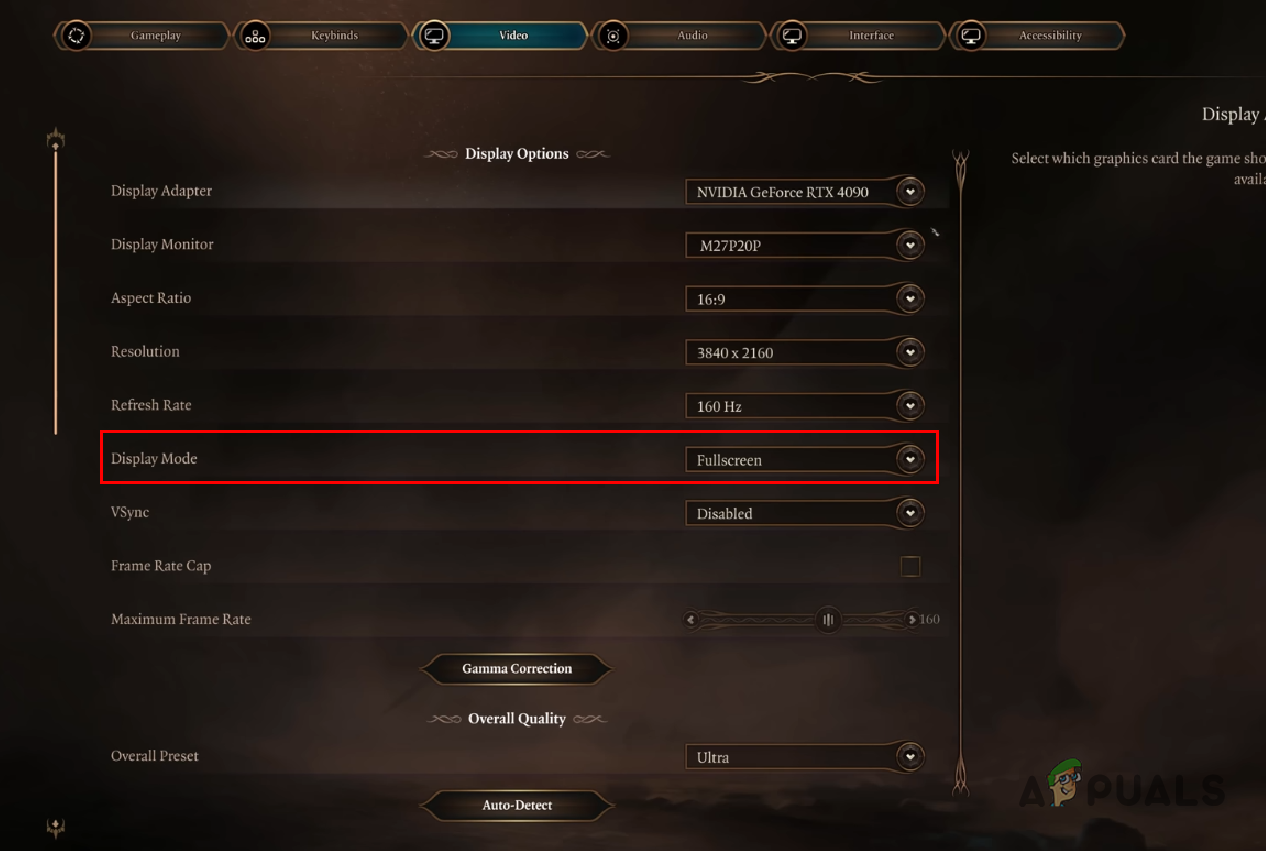
Changing Display Mode to Fullscreen - Then, tick the Frame Rate Cap option and set the maximum FPS to 60.
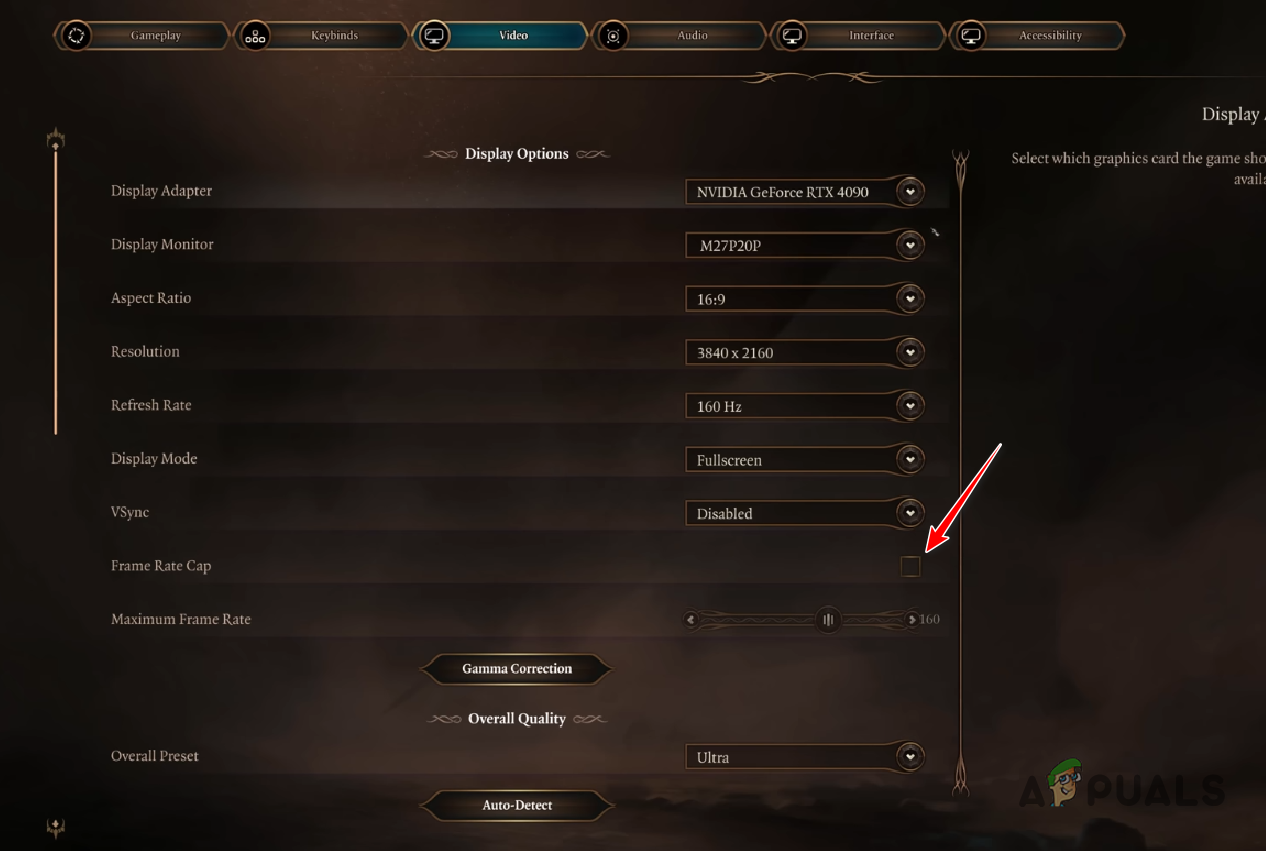
Enabling Frame Rate Cap - In addition, lower the quality preset via the Overall Preset option.
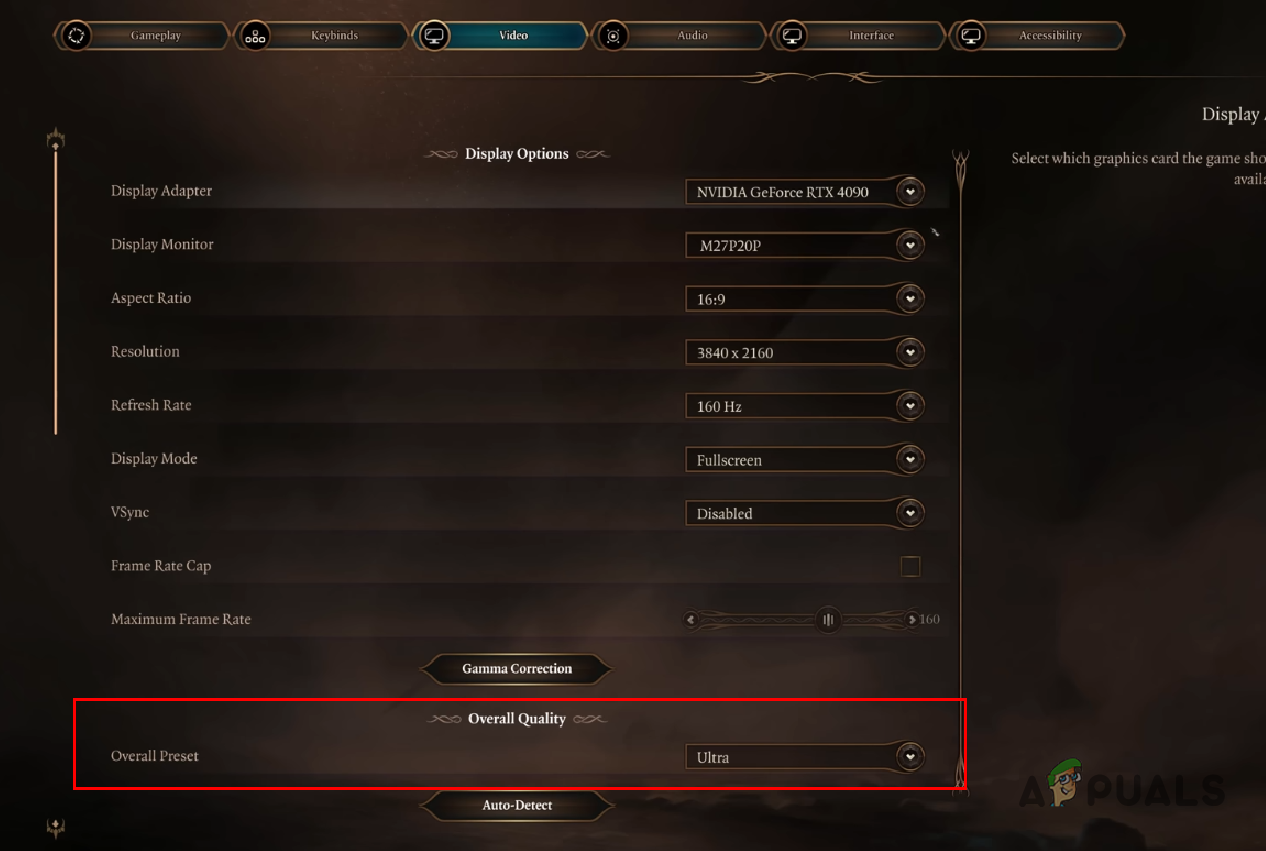
Changing Quality Preset - Finally, disable anti-aliasing as well.
- Apply the changes and see if the game continues to crash.
2. Run Baldur’s Gate 3 as Administrator
The game can sometimes run into the DirectX issue due to insufficient permissions on your machine. In such an instance, you will have to run the game with administrative privileges to ensure it has the needed permissions to run smoothly in the Windows environment.
This can also help with third-party programs causing the game to crash, such as your antivirus. To run the game with admin privileges, follow the instructions below:
- First, open the Steam client on your machine.
- In the Steam client, navigate to the Library and right-click on Baldur’s Gate 3. Select the Manage > Browse local files option.
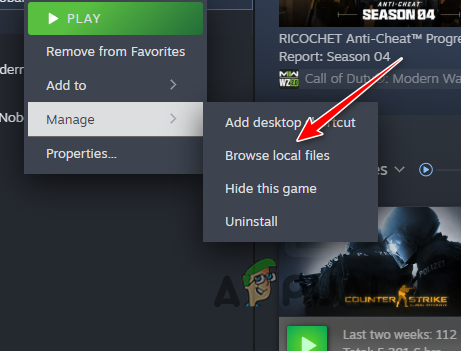
Opening Baldur’s Gate 3 Installation Folder - After that, in the File Explorer window that opens, right-click on the game executable (.exe) file and select Properties.
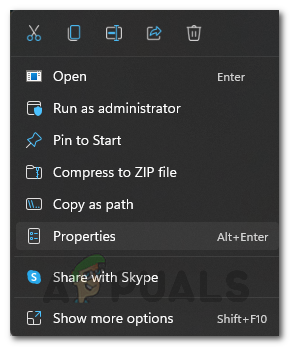
Opening Properties Window - In the Properties window, navigate to the Compatibility tab.
- Then, click the Run this program as administrator box and hit Apply.
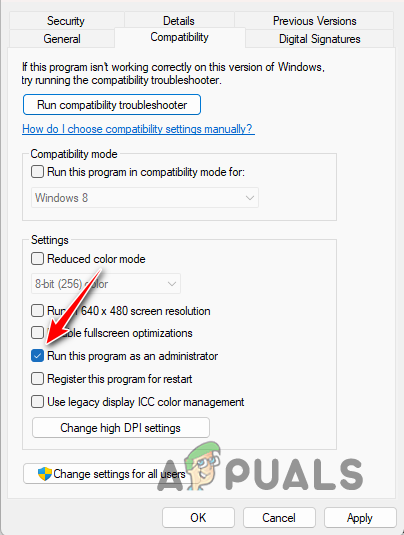
Enabling Run as Admin Option - See if that fixes the issue.
3. Disable Third-Party Overlay
Some applications on your computer provide an in-game overlay that allows you to access the app without having to tab out from your game. These overlays can often cause crashes with Baldur’s Gate 3 since they interfere with the game files.
In such a situation, you will need to disable the third-party overlays to resolve the issue. We will be showing you how to disable Discord and GeForce Experience overlays below. However, if you have any other apps that provide an in-game overlay, make sure to disable them too.
Discord
- Start by opening Discord.
- Go to the Settings menu via the gear icon.

Opening Discord Settings - Then, switch to the Game Overlay tab.
- Use the slider at the top to disable the Discord overlay.
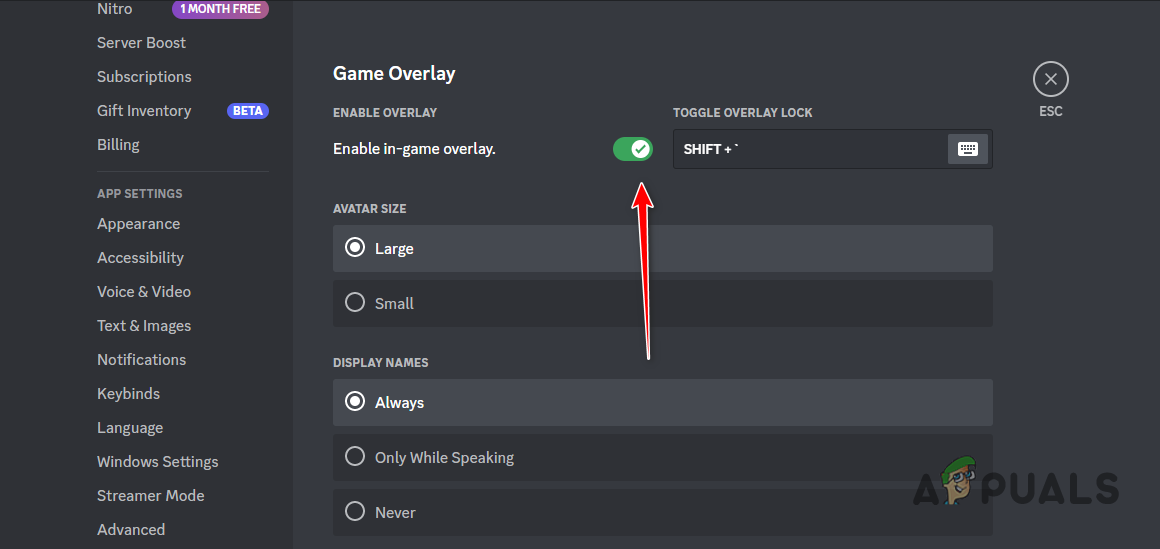
Turning off Discord Overlay
GeForce Experience
- Open the GeForce Experience via the Start Menu.
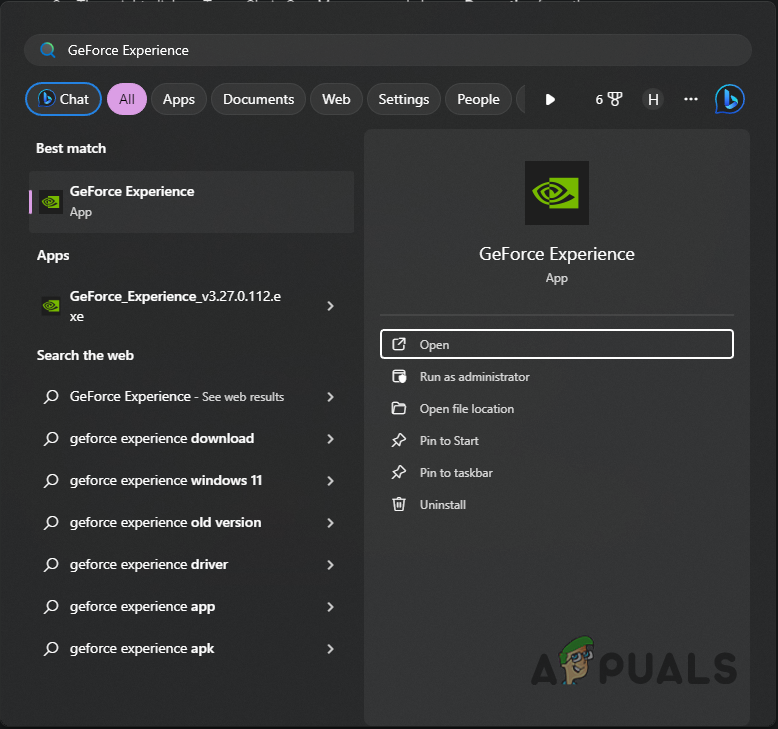
Opening GeForce Experience - Then, click the Settings icon in the top-right corner.
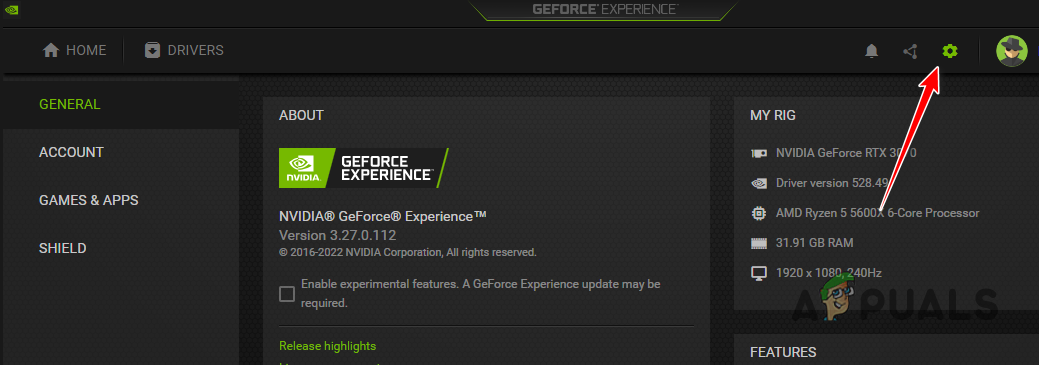
Opening Settings Menu - After that, use the in-game overlay slider to disable the overlay.
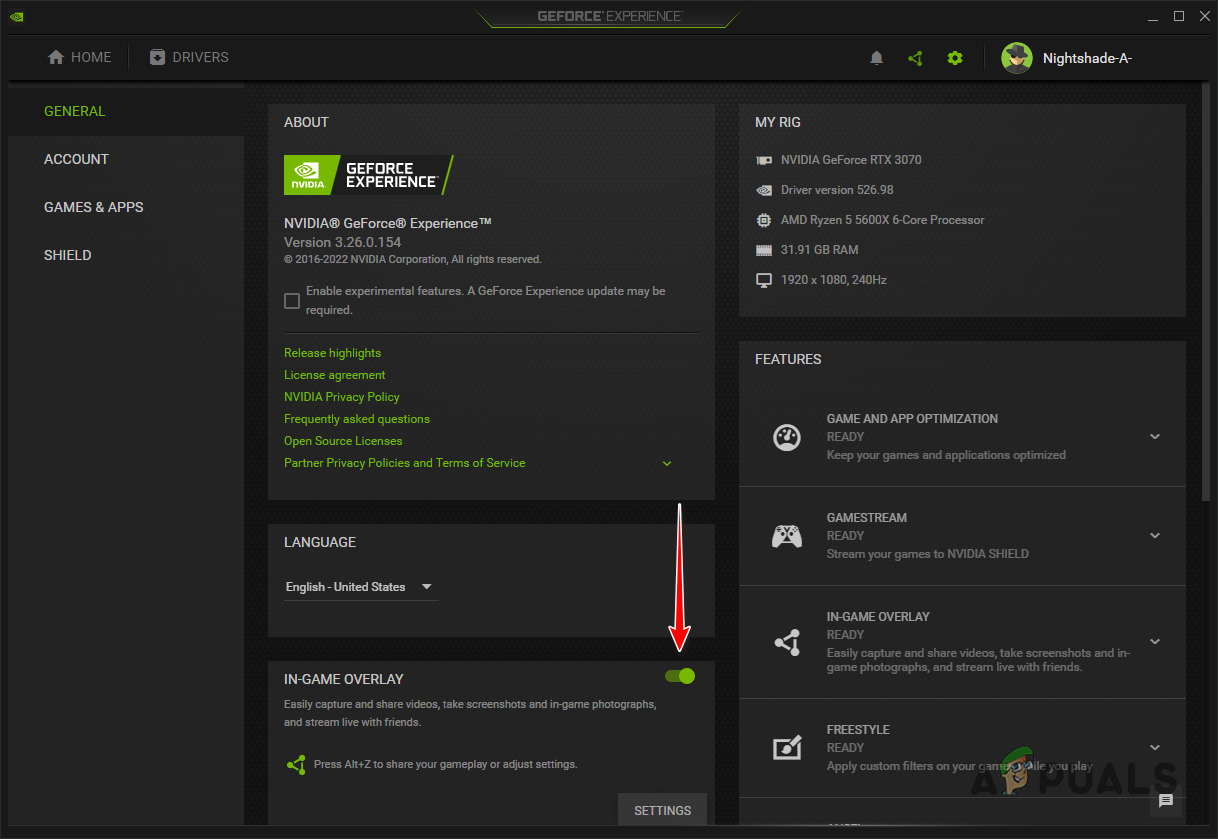
Disabling GeForce Overlay
4. Delete Baldur’s Gate 3 Cache
The Baldur’s Gate 3 cache on your computer can also be the culprit for the DirectX error. This occurs when the cache is damaged which leads the game to various issues. You will need to clear the cache on your computer to resolve the issue in such a situation.
Clearing the cache is completely safe to do. It will be created automatically on the next startup of the game. Follow the instructions below to delete the cache:
- Open the Run box with the Windows key + R shortcut.
- After that, type in %localappdata% and press Enter in the Run box.
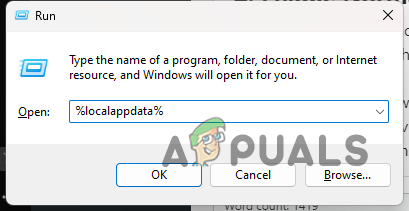
Opening the Local AppData Directory - This will open a File Explorer window.
- Then, open the Larian Studios folder.
- Before you delete the folders, navigate to Baldur’s Gate 3 > PlayerProfiles > Public directory and copy the Savegames folder to a different location. This contains all of your saved files.
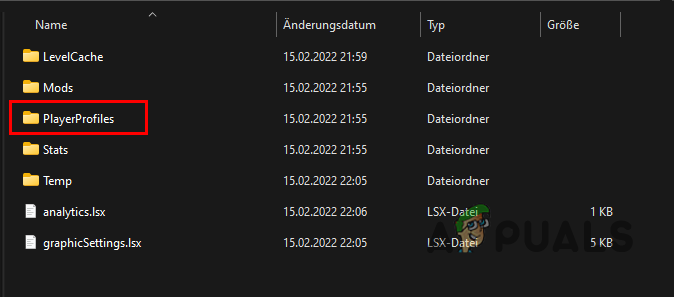
Navigating to PlayerProfiles folder - After that, delete the Baldur’s Gate 3 and Launcher folders.
- Once you do that, launch the game. Play the game for a while and see if it crashes.
- To restore your progress, paste the Savegames folder inside the PlayerProfiles folder again.
- If the game crashes after restoring your progress, the saved files are corrupted and you will need to delete them.
5. Change NVIDIA Settings for Baldur’s Gate 3
Another way you can remedy the DirectX error with Baldur’s Gate 3 is to change the Vulkan/OpenGL API present method via the NVIDIA Control Panel. This setting is used to decide what type of mechanism is used by the Vulkan and OpenGL API.
Follow the instructions below to do this:
- First, open the NVIDIA Control Panel by searching for it in the Start Menu.
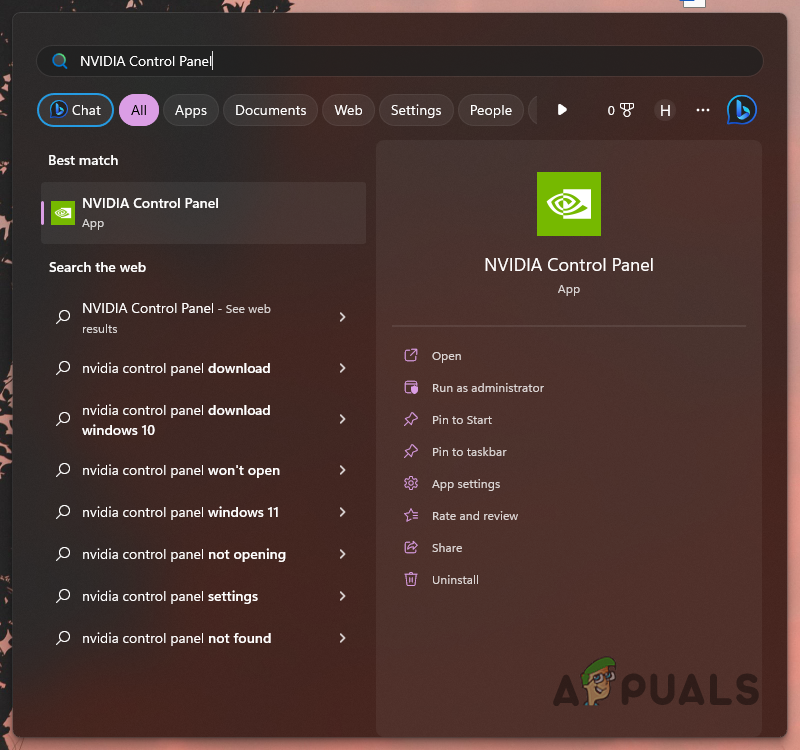
Opening the NVIDIA Control Panel - In the NVIDIA Control Panel, navigate to Manage 3D Settings.
- Then, switch to the Program Settings tab.
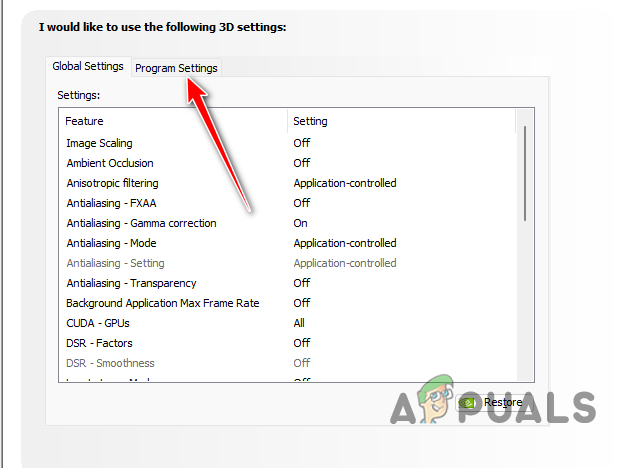
Navigating to Program Settings - From the drop-down menu, select Baldur’s Gate 3.
- After that, scroll to the bottom and select Prefer native as the Vulkan/OpenGL present method.
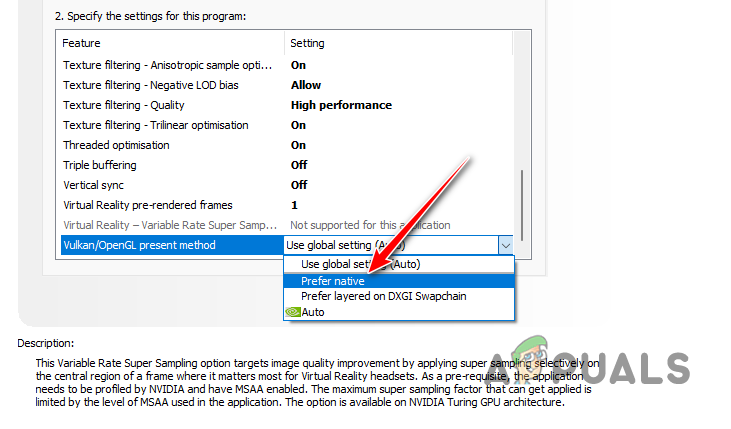
Changing Vulkan and OpenGL Present Method - Save the changes by clicking Apply.
- See if the problem goes away.
6. Disable Onboard GPU (if applicable)
The onboard GPU on your machine can also result in the DirectX error message. This happens when the game tries to use the onboard GPU instead of the dedicated graphics card installed on your motherboard.
In such a situation, you will need to disable the onboard on your computer via the Device Manager to resolve the issue. In case your motherboard does not come with an onboard GPU, skip this method and move to the next one below.
To disable the onboard GPU, follow the instructions below:
- First, open the Device Manager by searching for it in the Start Menu.
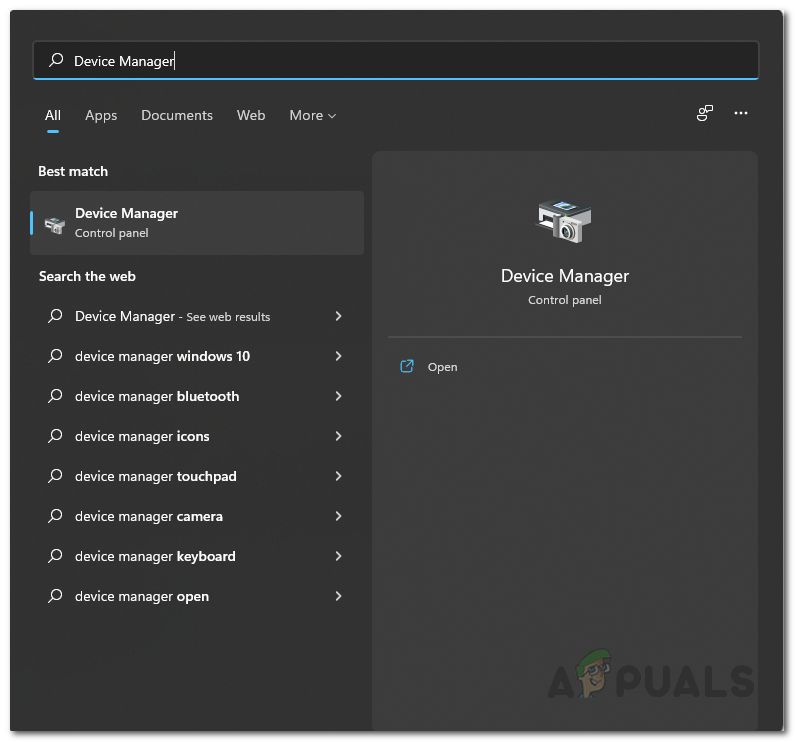
Opening Device Manager - On the Device Manager window, expand the Display adapters list.
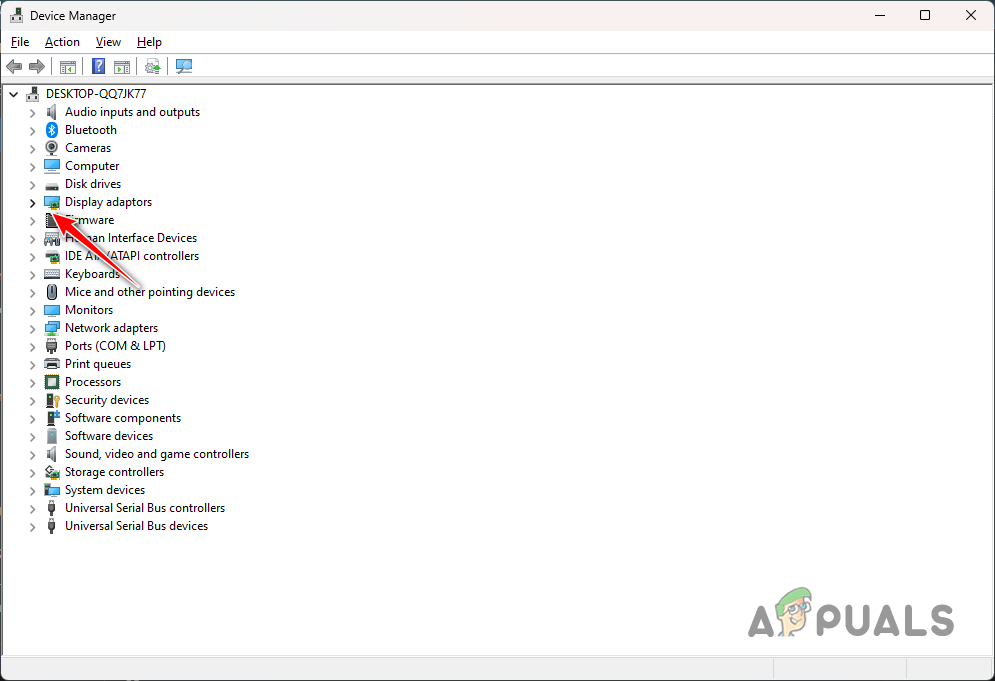
Expanding Display Adapters - From the list of adapters, right-click on your onboard GPU and select Disable device.
- Once you do that, open the game and see if the issue is still there.
7. Reinstall Graphics Drivers
The video drivers on your PC can also be another factor for the game crashing with the DirectX error. This happens when the drivers are obsolete and do not support the new game. In addition, corruption of the video drivers is bound to cause the issue as well.
Video card manufacturers often push out updates for newer games to offer better support and compatibility with the video drivers on your computer. As such, if you have not updated your graphics drivers, you will need to do so.
This will require you to completely uninstall the graphics drivers before installing them again. Follow the instructions below to do so:
- First, download the third-party Display Driver Uninstaller (DDU) utility from the official source here.
- After that, extract the tool to a location on your PC.
- Then, double-click the Display Driver Uninstaller.exe file to open the program.
- Once it launches, click the Continue option to proceed on the Options screen.
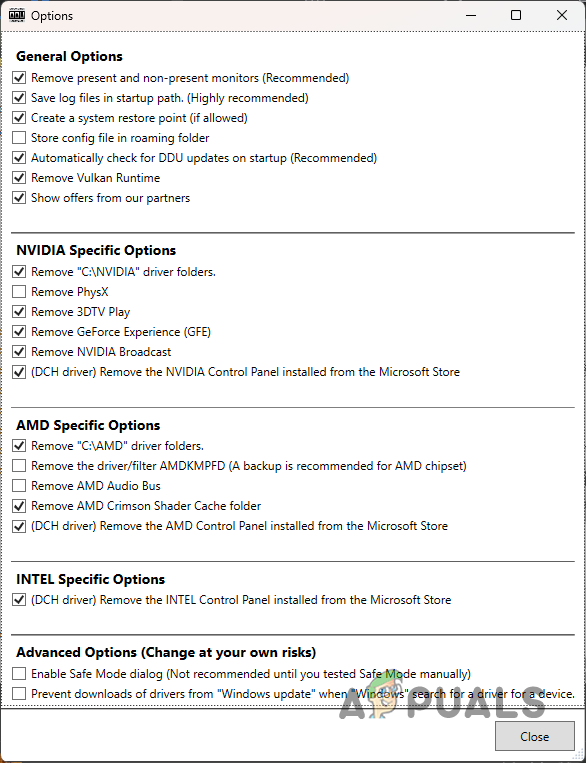
General Options Screen - Now, use the Select device type menu to select GPU.
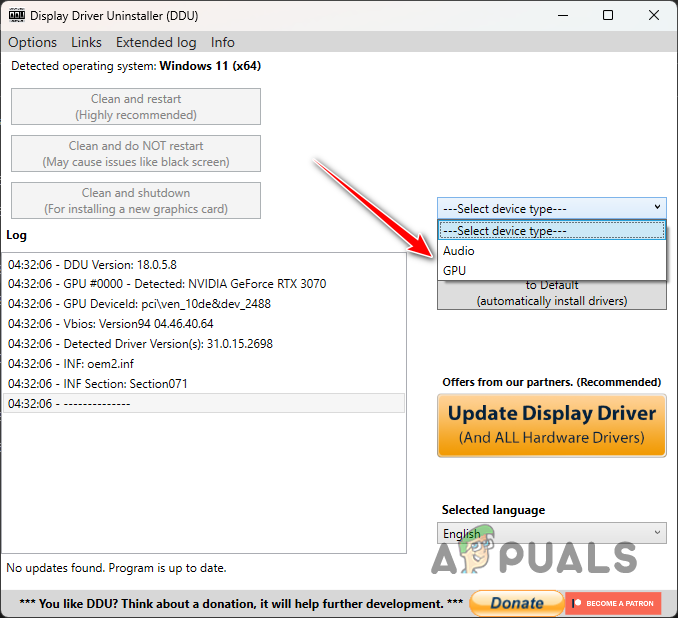
Selecting GPU as Device Type - Then, use the Select device menu to choose your video card manufacturer.
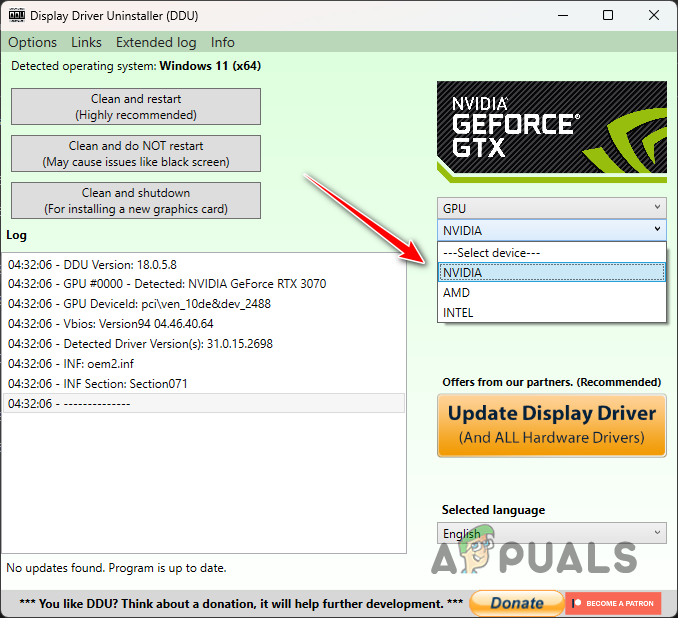
Selecting Display Card Brand - After that, click the Clean and restart option to remove the video drivers.
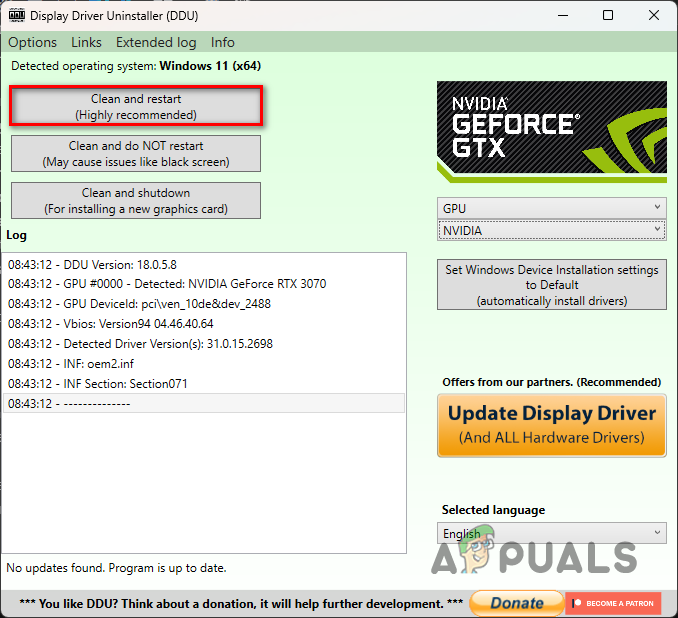
Uninstalling Display Drivers - Once your PC restarts, go to your graphics card manufacturer’s website.
- Download the latest drivers available for your display card and install them.
- See if the DirectX still occurs.
8. Disable SAM or Resizable Bar
Smart Access Memory or Resizable are technologies from AMD and NVIDIA respectively that can improve the performance of your games. This performance gain is not significant, and it is only supported on a small list of games.
These features change how textures from your CPU are transferred to the GPU for rendering. This can cause the DirectX error in Baldur’s Gate 3, which is why you will need to disable the features.
As it happens, you cannot disable or enable SAM or Resizable Bar from Windows. You will need to boot into your BIOS configuration to do so. Thus, boot into your BIOS configuration and disable SAM or Resizable Bar if you have enabled them. Once you do that, see if the DirectX error still comes up.
9. Remove Applied Overclocks
Finally, if none of the above methods resolve the issue, you will need to remove any overclocks that you have applied to your components. Overclocking can be really beneficial as it can provide a free performance boost. However, this can come at the cost of stability, in some cases.
The issue mainly includes the memory on your computer, so you can take this one step at a time. Start by removing the DOCP or XMP profile via the BIOS configuration and see if that gets rid of the issue. In case the problem persists, you will need to remove any overclocks applied to your CPU or GPU as well to overcome the error message.
With that, you should be able to subside the DirectX error message in Baldur’s Gate 3. In most cases, the problem occurs due to interference of third-party apps or overclocked components. Keep these two things in check and you should be able to avoid the issue in future.
Still facing DirectX error in Baldur’s Gate 3?
If the DirectX error in Baldur’s Gate 3 persists after the solutions above, you will need to contact the customer support team for Baldur’s Gate 3 via the official website. To do this, you will need to create a ticket and provide the required details. The customer support team will be able to assist you better by having a look at the crash logs and providing a solution to resolve the issue.
 Reviewed by