How to Stop Your Windows from Scrolling by Itself
Windows scrolling by itself is often due to the system erroneously receiving continuous scroll signals, which can be caused by hardware issues such as a malfunctioning scroll wheel, improper mouse settings, or outdated drivers.
Such unintended scrolling may result from a faulty mouse, keyboard, or touchpad that continuously sends scroll commands to the system. Additional contributing factors might be bugs in Windows, outdated versions of the operating system, or issues that emerged after recent updates.
To address this problem, it is recommended to disconnect all peripheral devices to determine if the issue continues, and then follow troubleshooting steps like adjusting mouse settings, updating or reinstalling drivers, and ensuring your Windows system is current.
1. Reconnect the Mouse and Keyboard
Start by reconnecting your mouse and keyboard when you experience scrolling issues in Windows. This action can resolve communication inconsistencies that trigger the scroll function in Windows.
This is particularly useful for wireless mice and keyboards. Scrolling can also be caused by your keyboard if navigation or other special keys are malfunctioning.
If needed, remove the Bluetooth dongle from your computer, wait a few seconds, and then reconnect it to refresh the drivers and potentially resolve the issue.
2. Change Mouse Settings
Issues with scrolling in non-active Windows apps might stem from a specific mouse setting. Windows has an option to automatically scroll inactive windows upon hovering over them.
- Press the Win key + I to open the Settings app.
- Go to Bluetooth and devices > Mouse.
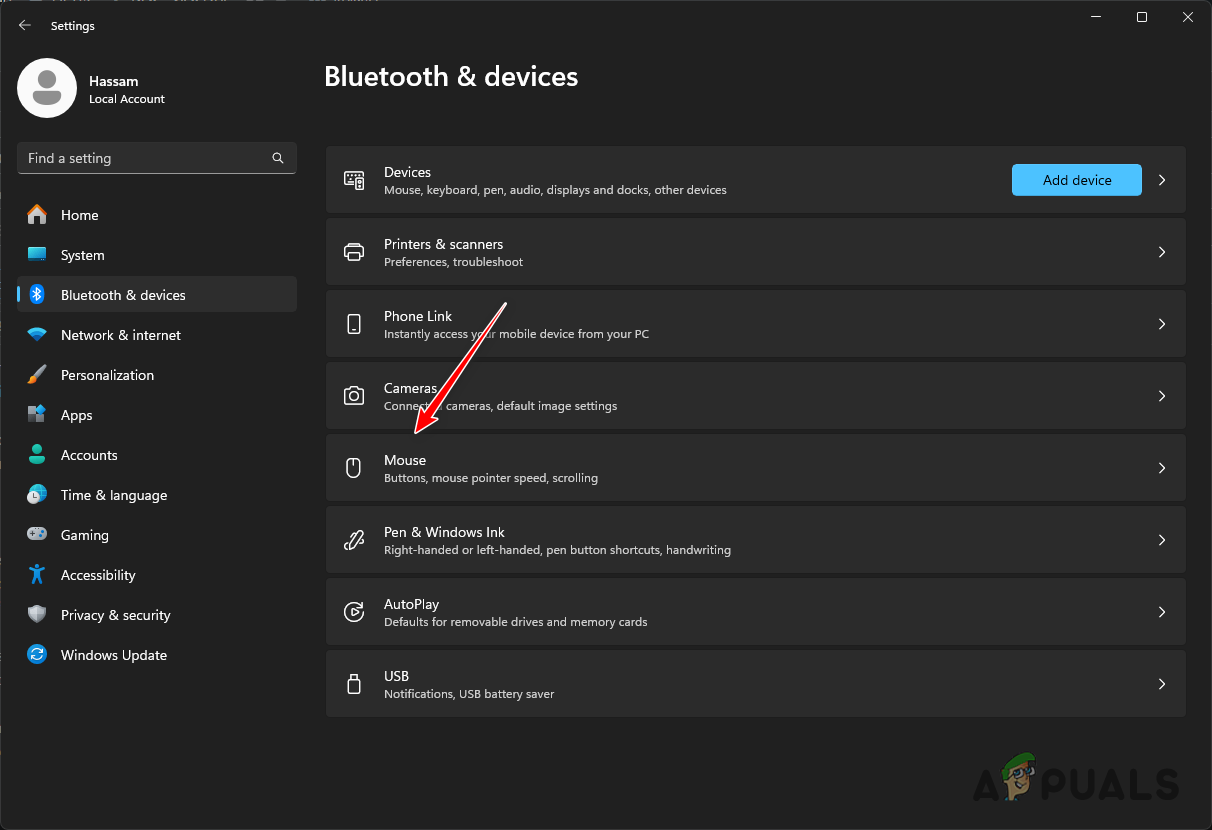
Navigating to Mouse Settings - Turn off the Scroll inactive windows when hovering over them function.
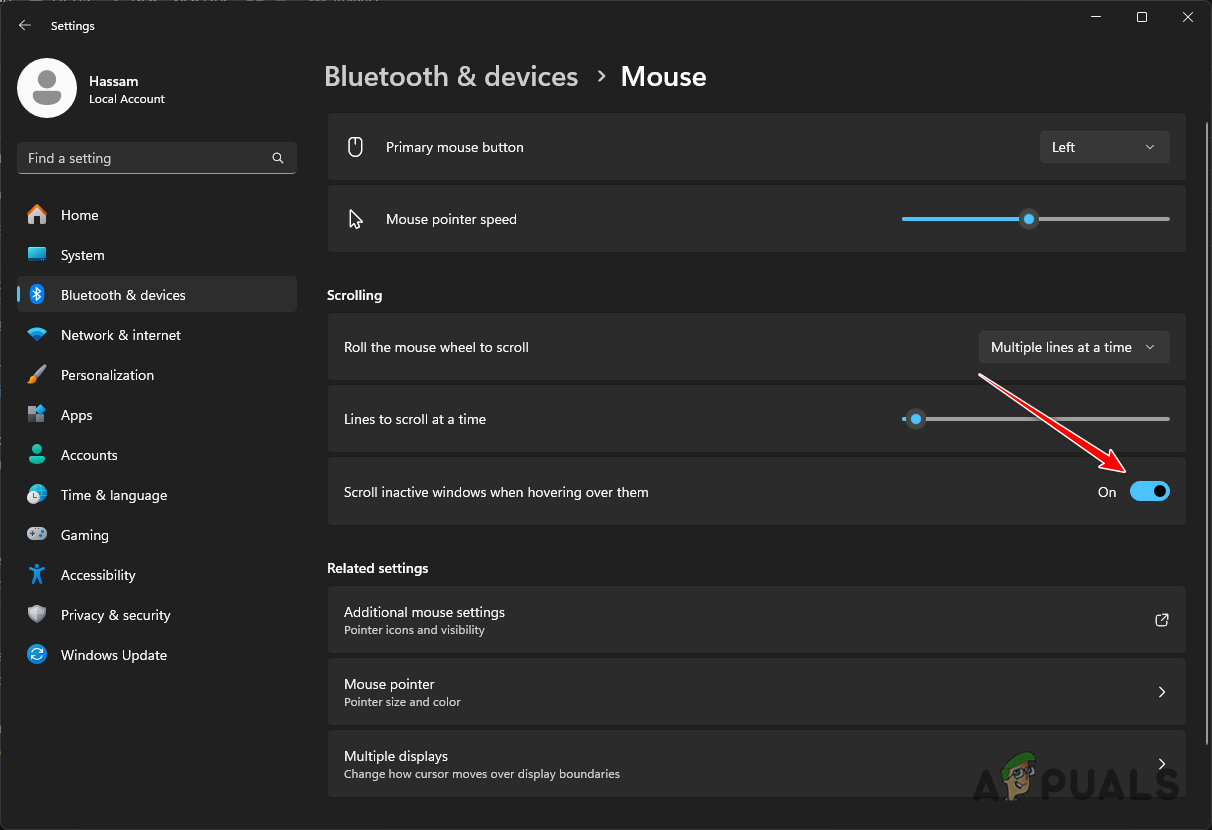
Turning off the Scroll Inactive Windows Option - Consider adjusting additional options under the Scrolling section to refine the functionality.
3. Reinstall Mouse Driver
A corrupted mouse driver may also lead to scrolling problems in Windows. To correct this, you’ll need to reinstall the mouse driver.
- Search for and open Device Manager from the Start menu.
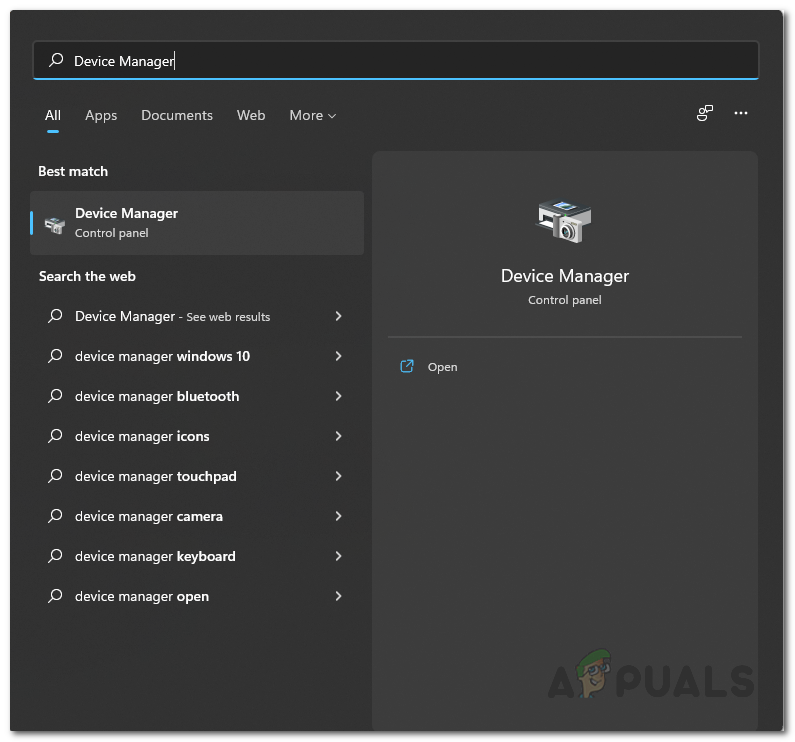
Opening the Device Manager - Expand the Mouse and other pointing devices category.
- Right-click on your mouse driver, typically labeled as HID-compliant mouse, and choose Uninstall device.
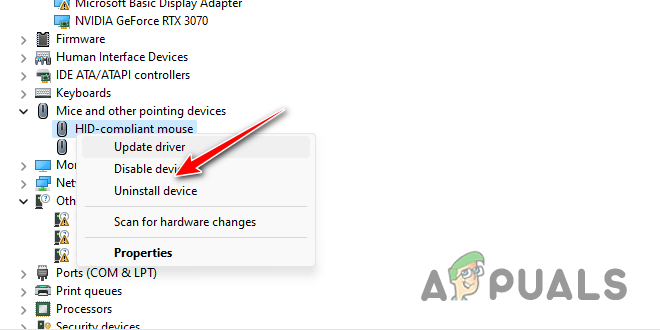
Uninstalling Mouse Driver - After uninstalling, disconnect your mouse for a few seconds.
- Reconnect it to check if the scrolling issue has been resolved.
4. Check Bluetooth Devices
Problematic Bluetooth devices connected to your computer may also lead to unintended automatic scrolling. You will need to check and possibly remove such devices.
- Open the Settings app using the Win + I keys.
- Navigate to Bluetooth and devices > Devices.
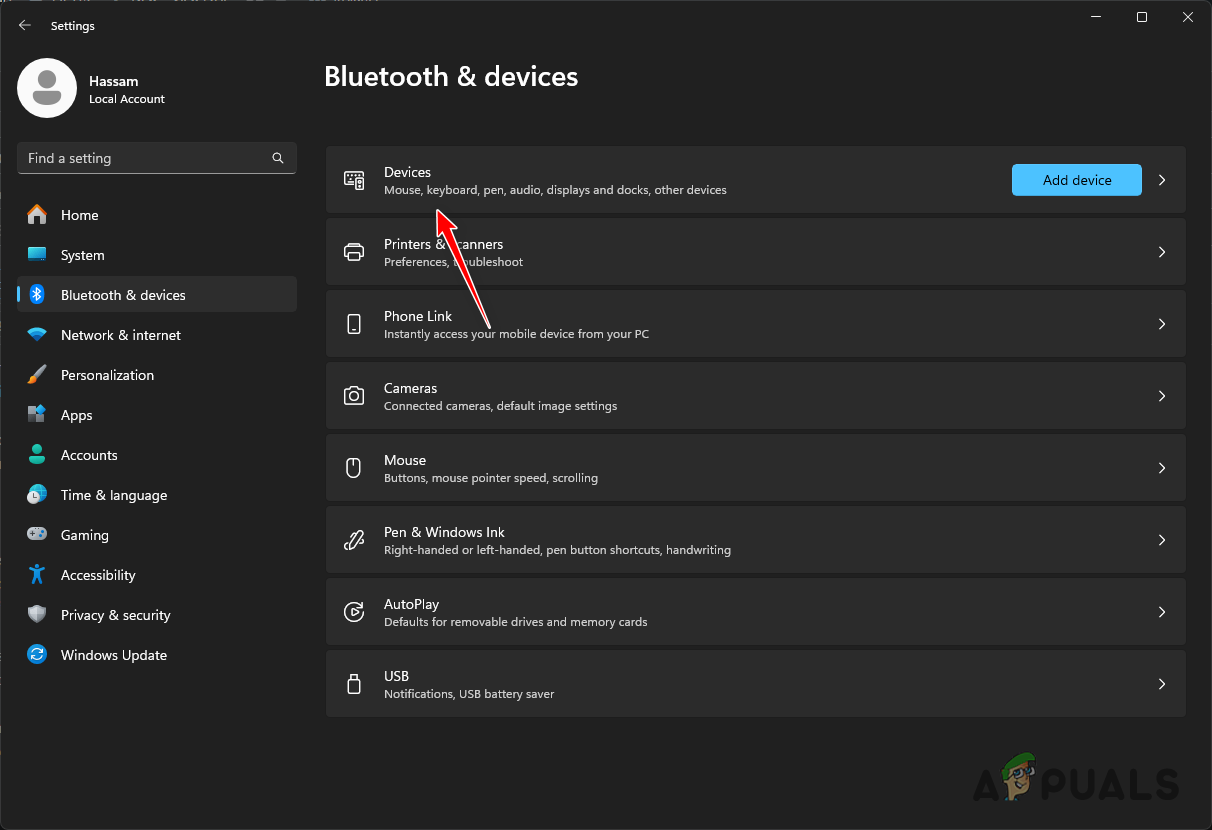
Navigating to Connected Devices - Examine the list of connected Bluetooth devices.
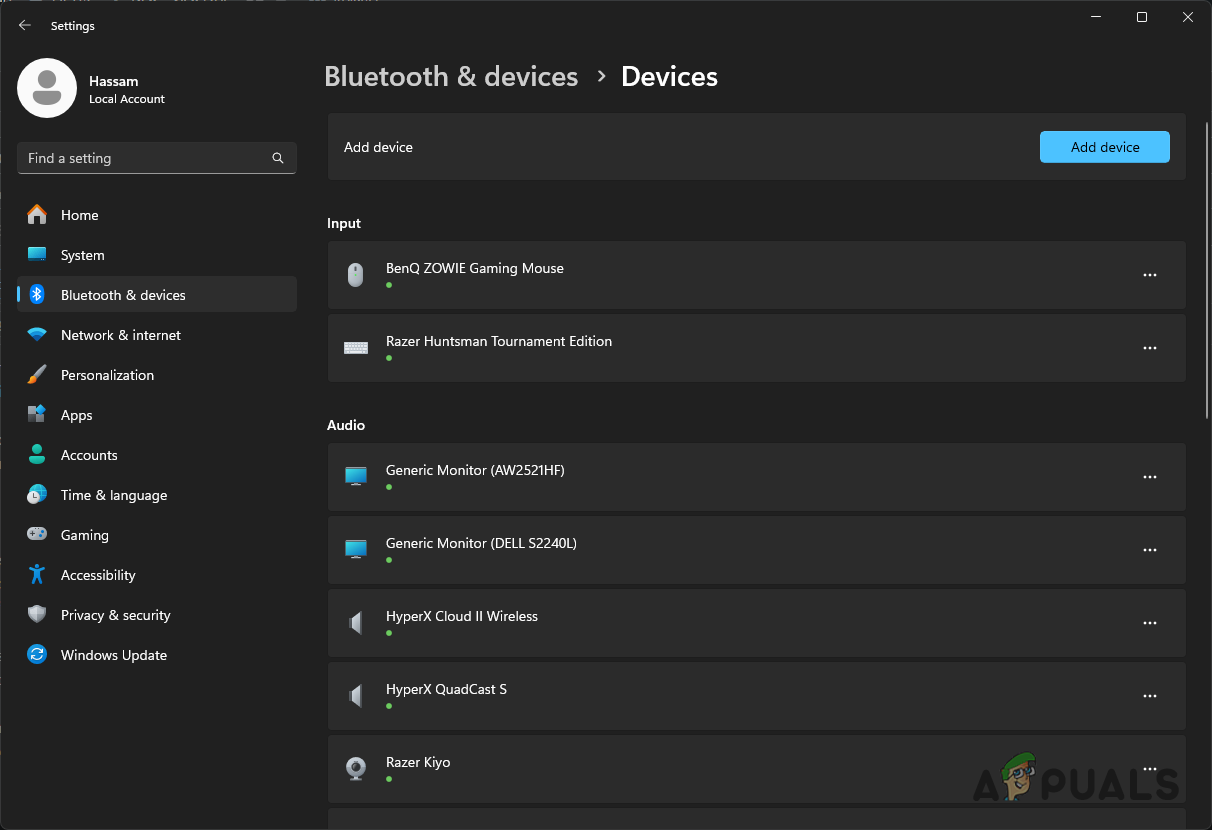
Connected Devices List - Remove any device that is no longer connected and re-check for the scrolling issue.
5. Troubleshoot Touchpad
If you’re using a laptop, you may need to troubleshoot the touchpad as it could be responsible for the scrolling issue. You can do this by temporarily disabling the touchpad.
- Access the Settings app with the Win key + I shortcut.
- Go to Bluetooth and devices > Touchpad.
- Turn off the touchpad using the toggle switch.
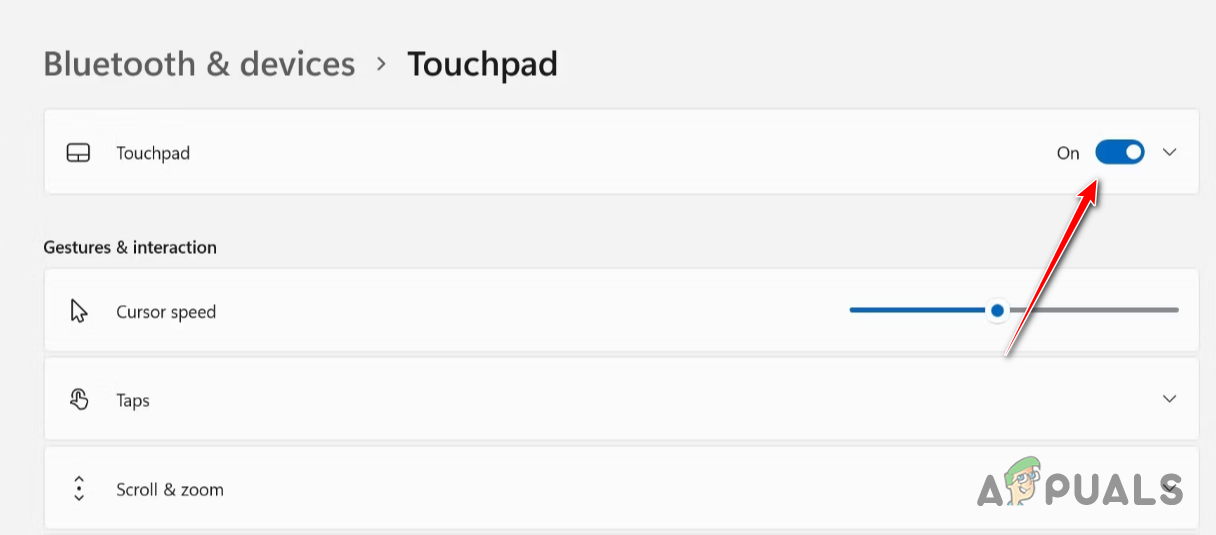
Disabling Touchpad - Test for scrolling issues while the touchpad is disabled, using the ALT + TAB shortcut to switch between applications.
6. Uninstall Any Duplicate Mouse Driver
The presence of duplicate mouse drivers in the system can be another reason for the Windows scrolling issue.
- Open the Device Manager by searching for it in the Start Menu.

Opening the Device Manager - Expand the Mouse and other pointing devices section.
- Identify and uninstall any duplicate mouse drivers if only one mouse is connected.

Uninstalling Mouse Driver - After removal, verify if the scrolling issue still occurs.
7. Clean Install Windows
If none of the above solutions work, a clean installation of Windows may be necessary. This step can address software inconsistencies that might be causing the issue.
However, a clean installation will erase all data on the system drive, so it is crucial to back up important files before proceeding. You can find a comprehensive guide on how to perform a clean install of Windows.
If scrolling continues after a clean installation, it indicates a hardware problem, and you may need to replace your mouse or keyboard.
