How to Troubleshoot and Fix a GPU Not Detected by Your PC
If you own a GPU, it’s possible that you’ll eventually encounter an issue where your graphics card is not recognized by your system. This can happen in various situations: perhaps you’ve installed a new graphics card that is not being detected, or your previously functioning card has suddenly become unrecognizable. Typically, you’ll notice this when graphics-dependent applications fail to run, or when the card is absent from the device manager.
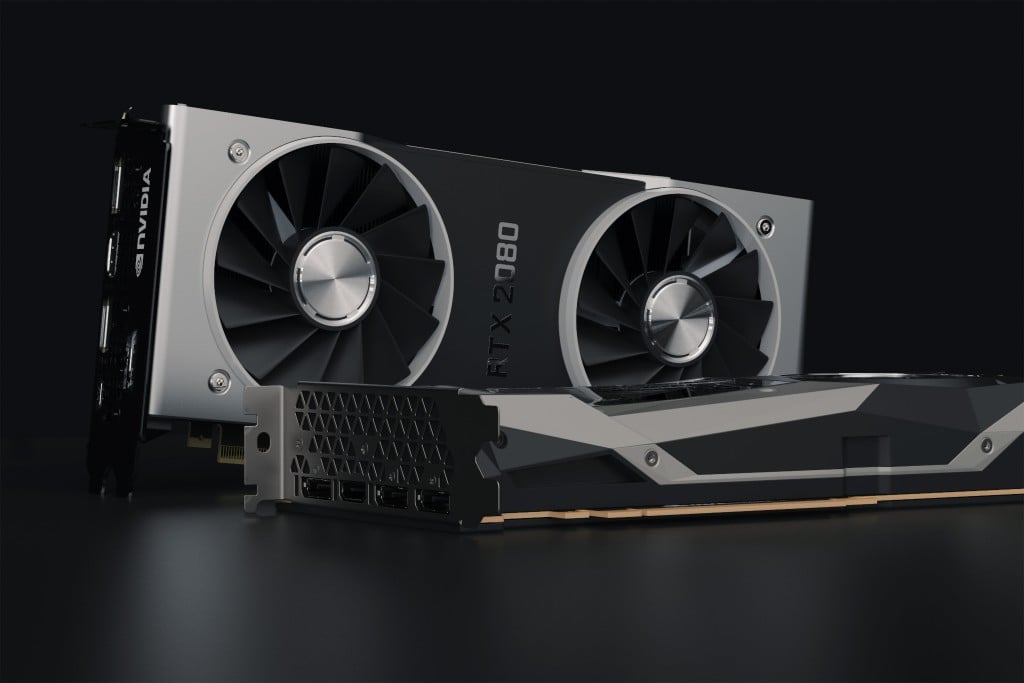
Several factors could potentially cause this problem. It may stem from faulty drivers, incorrect BIOS settings, hardware malfunctions, issues with the GPU slot, or even a defective graphics card. Power supply problems could also be the culprit. The root cause can differ based on whether the graphics card is newly installed or if it has suddenly stopped being recognized by the system.
Before you begin: Make sure the graphics card is compatible with the motherboard. Older motherboards might not support newer graphics cards without a firmware update, and vice versa. Users should confirm this compatibility to prevent detection issues.
Method 1: Check Graphics Card Slot
Occasionally, the problem may lie with the GPU slot itself. Your motherboard features slots for inserting a graphics card, any of which could become damaged, thus triggering detection issues.
Note: It is advisable to check the slots even if your graphics card was previously functioning correctly, as slots can become defective unexpectedly.
- Remove the back cover of your computer.
- Inspect the motherboard and graphics card slots. Power on your computer and observe whether the graphics card, particularly its fan, is operational.
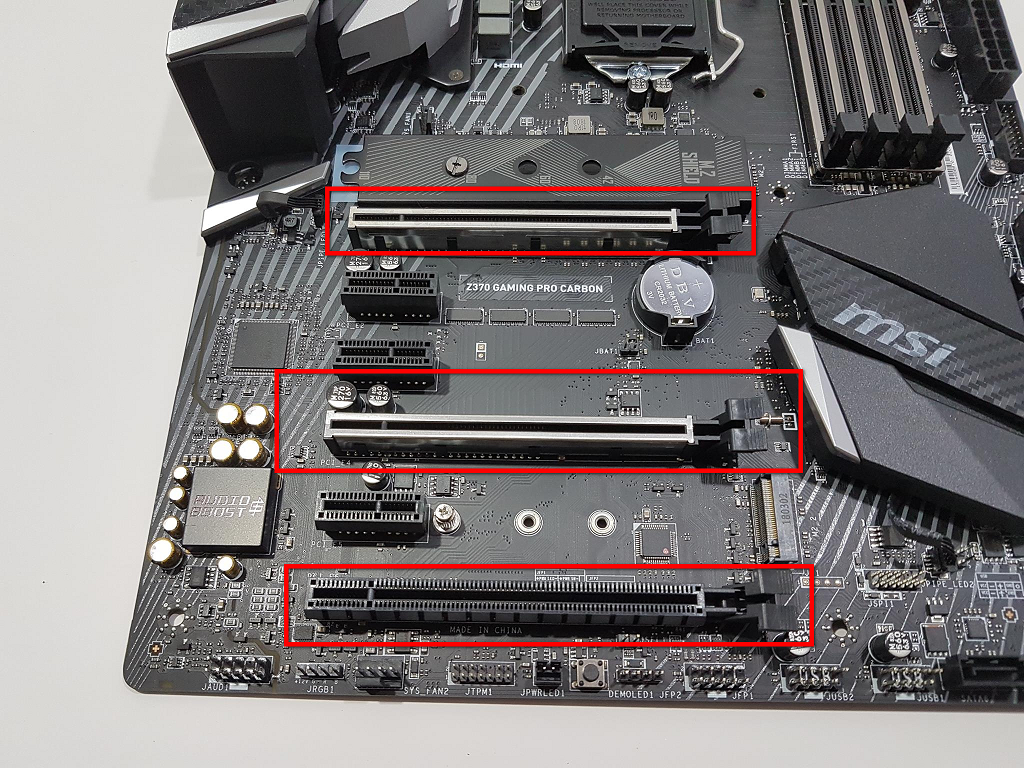
- If there is no sign of the graphics card functioning, then the slot may be at fault – either damaged or faulty.
- Power off your computer, remove the graphics card, and try inserting it into another slot to see if the issue is resolved.
If the problem persists and other slots are available, test each one in turn, as there may be multiple defective slots. Keep in mind that a functioning fan doesn’t necessarily indicate a fully operational GPU.
Method 2: Uninstall and Reinstall Graphics Drivers
Ensure that your graphics card drivers are correctly installed and up to date. If you have already installed drivers, consider reinstalling them, possibly with a clean installation, to see if this resolves the problem.
For guidance on uninstalling and reinstalling your graphics drivers cleanly, consult our article on the subject by clicking here, and follow the steps in either method 2 or method 3.
Check if this action fixes your issue afterwards.
Note: The linked article specifies steps for AMD drivers. If you have a graphics card from a different manufacturer, the procedures may differ slightly, but the general approach remains consistent. You should download the latest drivers from your manufacturer’s website and use a cleanup utility to remove remnants of the previous installation. Then, enter Safe Mode, uninstall the current drivers, use the uninstall utility, reboot your system, install the latest drivers, and finally exit Safe Mode.
Method 3: Set your Graphics Card to Default
For some, the solution could be as simple as designating the graphics card as the default for graphics operations, particularly applicable if the card is recognized within the graphics card control panel.
Note: The following instructions are specific to NVIDIA graphics cards. Steps may differ for other brands.
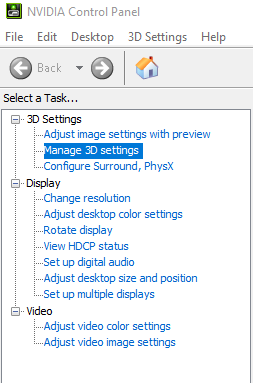
- Open the NVIDIA control panel by right-clicking on your desktop and selecting NVIDIA Control Panel.
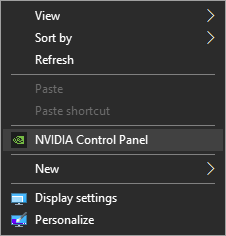
- Select 3D Settings.
- Choose Manage 3D Settings from the left pane, located under 3D Settings.
- Go to the Program Settings tab.
- Select a program for which you want to set the graphics card from the drop-down list in the Select a program to customize section.
- Choose High-performance NVIDIA processor from the drop-down list in the Select the preferred graphics processor for this program section.
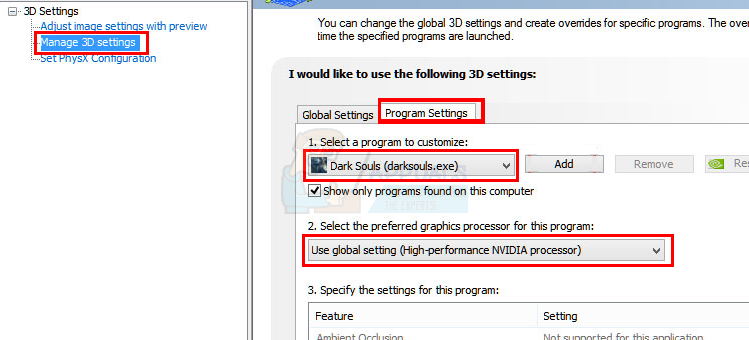
After completing these steps, close the control panel and test if the program now functions properly with the NVIDIA graphics card as the default device. Repeat these steps for other major applications as needed.
Method 4: Check Power Supply
If this is your first time attempting to use the graphics card and you are certain of its functionality, the issue may be related to your power supply. Some power supply units (PSUs) are unable to provide sufficient power to the graphics card. A running fan does not conclusively indicate that the power supply is adequately powering the graphics card.
It is not possible to provide an exact PSU requirement as it depends both on your power supply and your specific graphics card model. Compare the power ratings of your PSU and the power needs of your graphics card. If your power supply does not meet the minimum requirements, consider obtaining a different one that exceeds your graphics card’s power needs by a significant margin.
Also, double-check that your graphics card is powered correctly and that all necessary power leads are connected. Remember, the mere operation of the card’s fans does not guarantee that the power leads are appropriately attached.
Note: When purchasing a new power supply, prioritize reputable manufacturers such as EVGA, Corsair, SeaSonic, and Cooler Master, as these brands are known for their reliable power output, despite typically being more expensive.
Method 5: Change BIOS Settings
Altering certain BIOS settings can help resolve the issue if it is being caused by incorrect BIOS configurations.
- Power on your system.
- During boot-up, press Esc, F8, F12, or F10 as soon as your manufacturer’s logo appears. The correct key may vary depending on your hardware manufacturer and is typically indicated in one of the screen corners. Check which key you have to press in our detailed guide.
- If you are presented with a menu, navigate to and select the BIOS menu option using your arrow keys.
- Search for a setting named iGPU or iGPU Multi Monitors, often linked to multi-monitor setups. Disable this option if you use a single monitor.
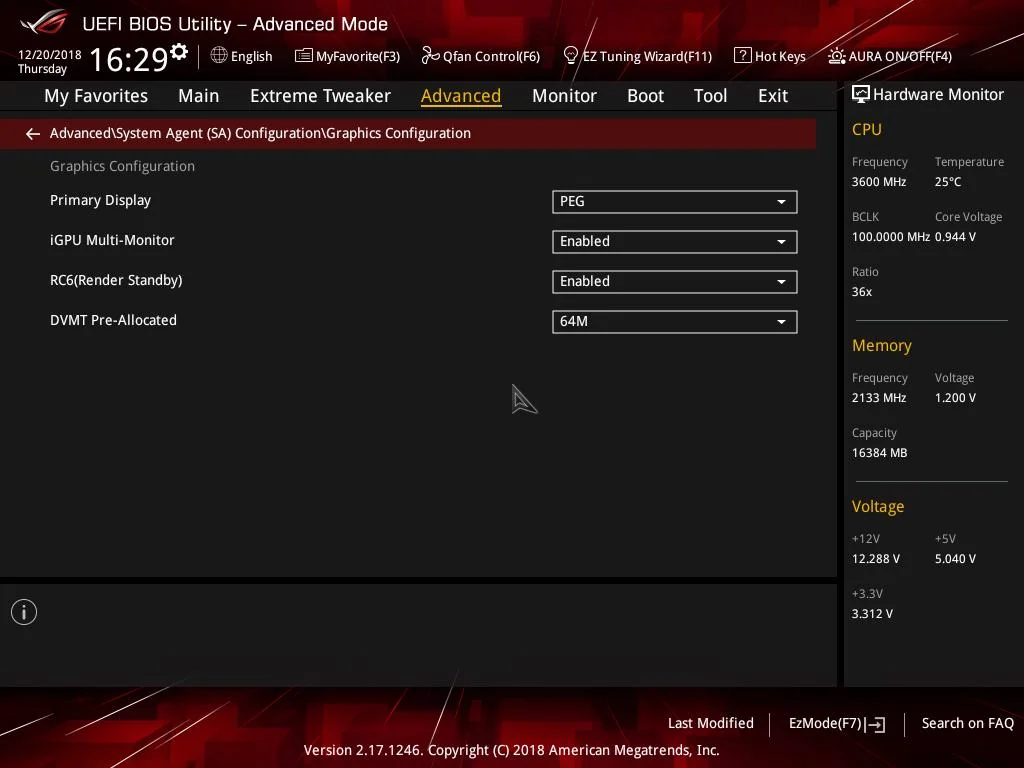
- Look for options related to PCI and PCI-E configurations such as PCI, Onboard, PCI-e, and PCI-e / onboard backup. Select the ones associated with PCI-e one at a time to see if either resolves the issue.

Method 6: Uninstall Windows Updates
Occasionally, problems arise as a result of Windows updates, such as new bugs that interfere with drivers and other system components. If the issue with your graphics card detection started after a recent Windows update, there is a possibility that the update is responsible.
Fortunately, Windows provides the option to revert to a previous build, although this is available only for a limited time. It’s worth checking if this option is feasible for you.
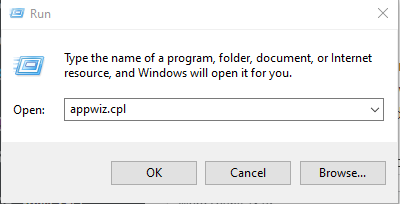
- Press the Windows key + R.
- Type appwiz.cpl and press Enter.
- Click View installed updates.
- Identify and select the recently installed updates by examining their installation dates.
- Choose Uninstall and follow the subsequent prompts.
- Consider removing any additional updates installed on the same day.
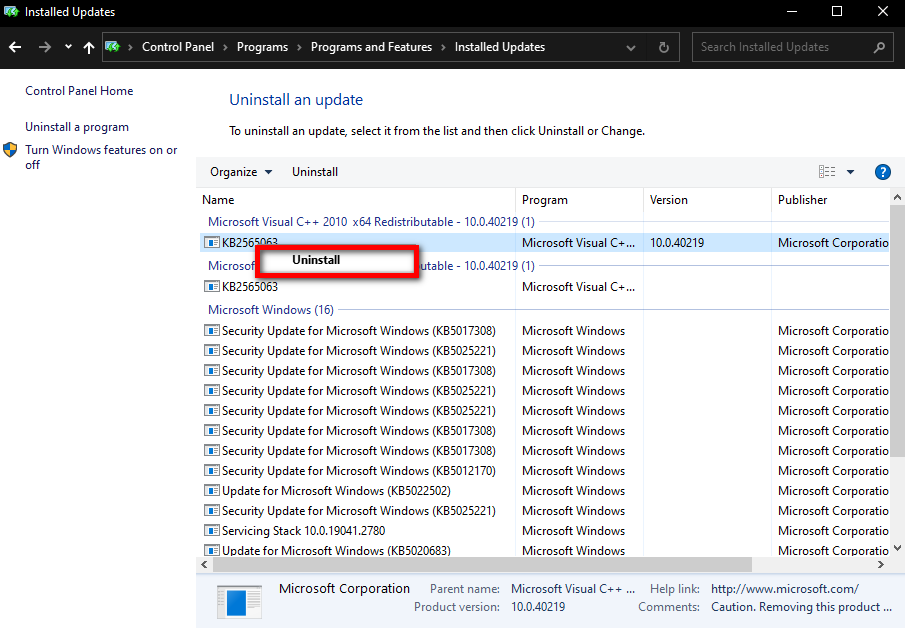
Restart your computer to check whether the problem has been resolved.
Method 7: Restore BIOS to Default
Restoring the BIOS to its default settings is another potential solution that has proved effective for many users. To reset your BIOS:
- Start your system.
- As your computer reboots, press either Esc, F8, F12, or F10 when the manufacturer’s logo is displayed. Continue with the appropriate steps based on whether you see the BIOS menu or a list of options:
- If a list appears, use the arrow keys to navigate to the BIOS menu and press Enter.
- In the BIOS menu, look for an option like Restore to defaults (or similar) and select it. You may then be prompted with additional instructions.
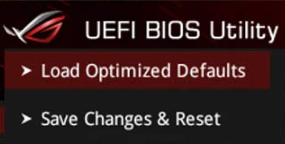
After resetting the BIOS to default, reboot your system and verify if the graphics card is now recognized.
Method 8: Update BIOS
Updating your BIOS to its latest version can resolve detection issues, as it ensures compatibility with the newest hardware among other benefits.
Note: BIOS updating is a sensitive process requiring technical know-how. If you are unsure about updating your BIOS, seek assistance from an expert. Incorrect updates could potentially lead to a non-functional computer.
For detailed guides on BIOS updates for various manufacturers, follow the instructions provided in our articles linked below:
Update BIOS on Lenovo: Click here.
Update BIOS on Dell: Click here.
Update BIOS on HP: Click here.
Update BIOS on GATEWAY: Click here.
Method 9: Reseat or Clean the Graphics Card
Dust build-up or improper seating of the graphics card can cause detection problems. Reseating the graphics card into its slot after cleaning can often resolve this issue.
- Power off your computer and unplug it from the power source.
- Open the computer case carefully.
- Gently remove the graphics card from its slot.
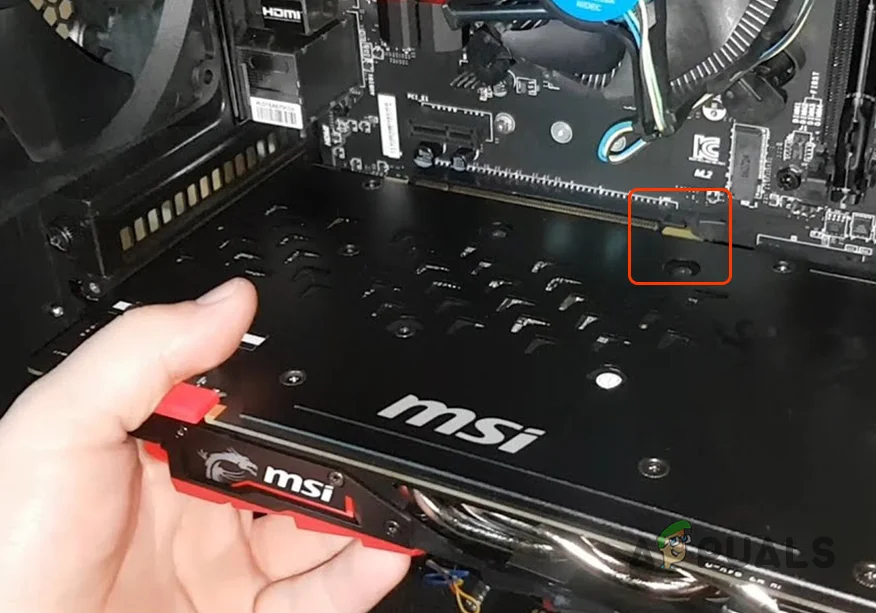
- Clean the gold contacts on the card with a soft rubber eraser, removing any debris or oxidation.
- Clean the slot and surrounding area with compressed air to remove dust.
- Reinsert the graphics card firmly back into the slot.
- Power on the computer and check for detection.
Method 10: Test the Graphics Card in Another System
To rule out the possibility of a defective graphics card, try testing it in a different, compatible system. This will confirm whether the issue is with the card itself or with the original computer’s hardware or software environment.
- Carefully remove the graphics card from the current system.
- Install the graphics card into another compatible system, following proper anti-static precautions.
- Boot the test system and check if the card is detected there.
By integrating these additional steps, the article can provide users with even more comprehensive guidance to troubleshoot and resolve cases of undetected graphics cards.