How to Fix a Stuck Logitech G Hub on the Loading Screen?
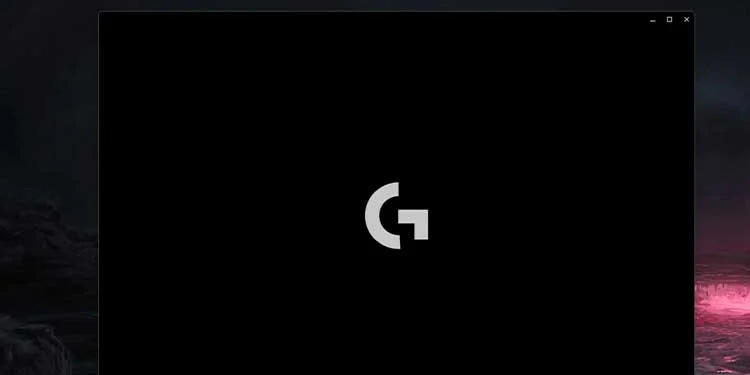
The Logitech G Hub stuck on the loading screen issue is a prevalent problem that hinders your ability to customize your peripherals. This typically arises when device drivers are outdated or configured improperly. Other causes might include outdated software, corrupted software files, conflicts with other programs, issues with hardware connectivity, or limited system resources, among others.
This article will guide you through precise steps to resolve this issue.
1. Close the G-Hub and Plug the Gear
When Logitech G Hub fails to load the device drivers, it halts completely and stucks on loading screen. To fix this, you have to unplug the Logitech peripherals and start G Hub without connecting any devices (related to Logitech).
- Right-click on the Logitech G Hub application in the system tray and select Quit.
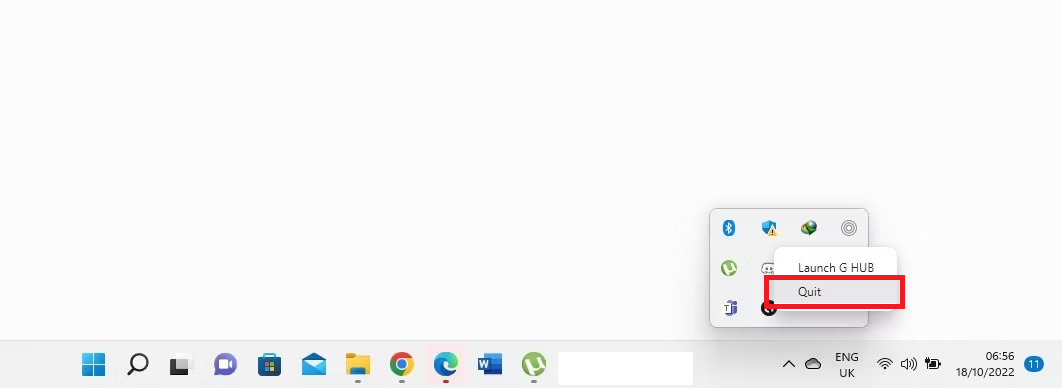
- Disconnect all Logitech peripherals.
- Launch the Logitech G Hub Application without the peripherals connected.
- Reconnect the devices and check if the loading issue persists.
2. Run As Administrator
Third-party applications like Logitech G Hub often require administrative privileges to adjust hardware settings. Here’s how to run the software as an administrator.
- Press the Windows key and type ‘Logitech G Hub’.
- Right-click on ‘Logitech G Hub’ and select Run as Administrator.
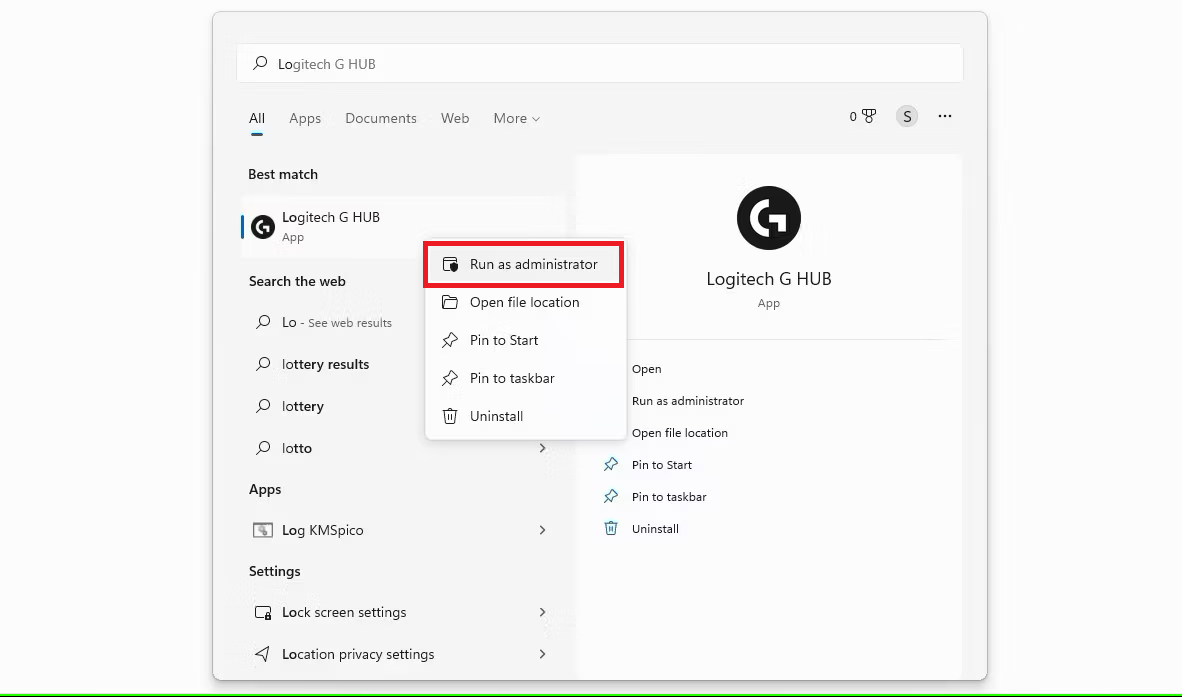
- When the User Account Control window opens, select Yes.
3. Restart Your Computer
Restarting your computer can resolve temporary glitches that prevent Logitech G Hub from functioning correctly.
- Save any unsaved work and close all programs.
- Click on the Start button, select the Power button, and then choose Restart.
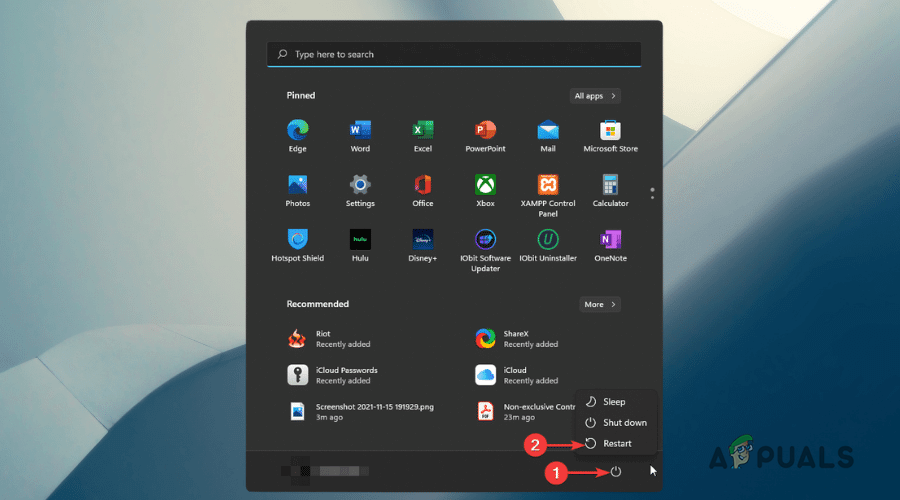
After the computer restarts, open the G Hub application to see if the issue has been resolved.
4. Force Close all G Hub Related tasks
G Hub processes may continue to run in the background even after the application is closed. You can fully stop the application by ending these processes.
- Right-click on the Windows icon and select Task Manager.
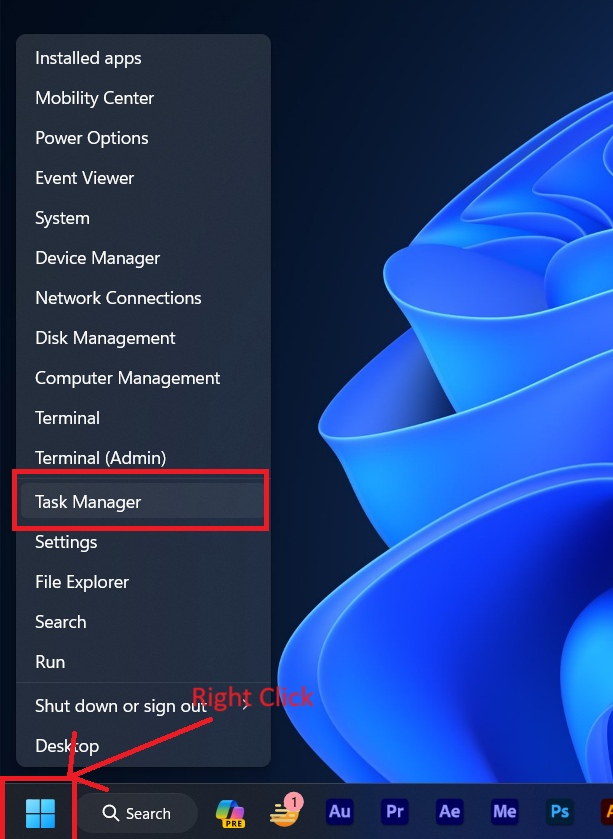
- In Task Manager, locate processes named LGHUB, LGHUB Agent, and LGHUB Updater.
- Right-click on each task and select End Task.
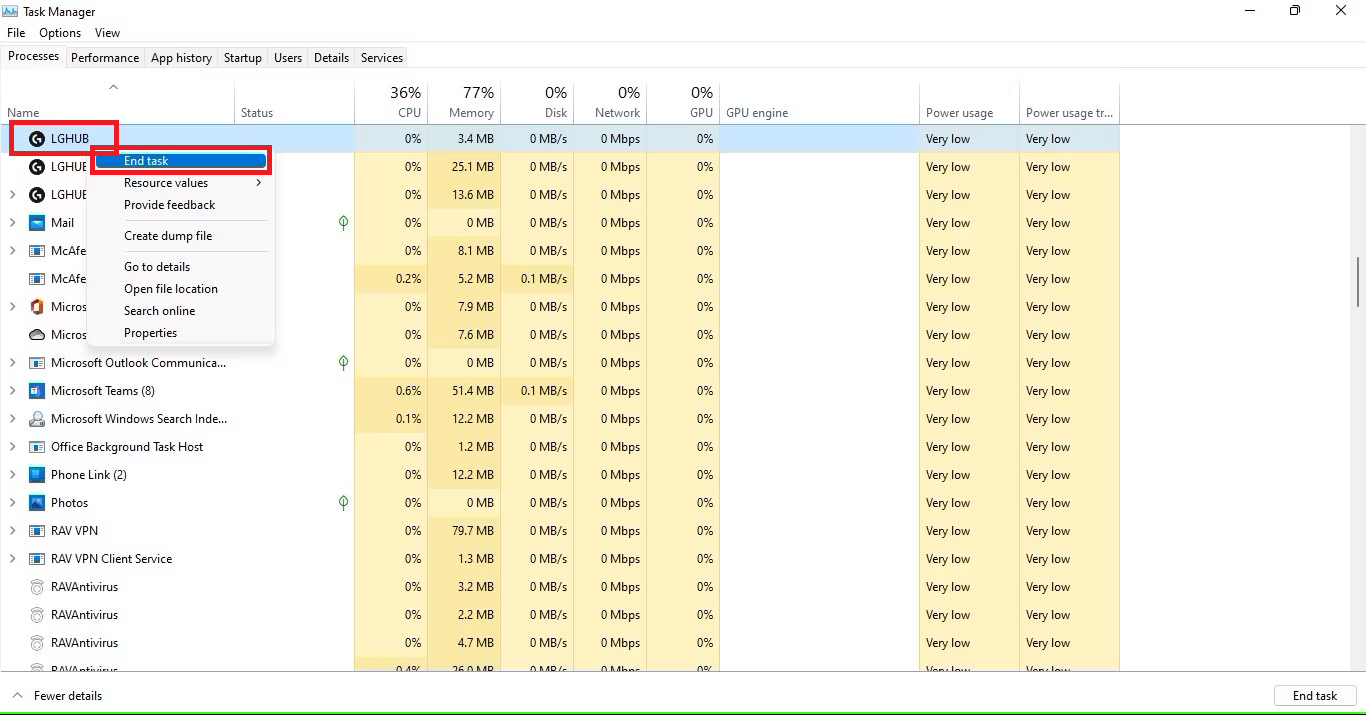
- Navigate to the directory:
C:\Program Files\LGHub
and run ‘lghub_updater.exe’, ‘lghub_agent.exe’, and ‘lghub.exe’ as Administrator.
After these steps, the issue should be resolved.
5. Restart the LGHUB Services
Sometimes the updater services are glitched and stopped which can cause this issue. It needed to be restarted to work properly.
- Press Windows + R, type Services.msc and press Enter.
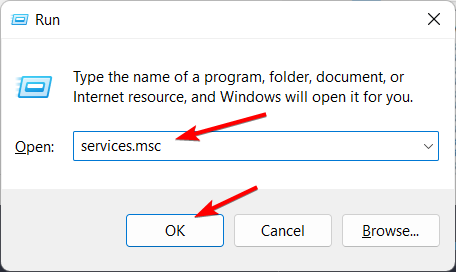
- In the Services window, locate and right-click on ‘LGHUB Updater Service‘ and select Stop.
- Right-click again and select Start to restart the service.
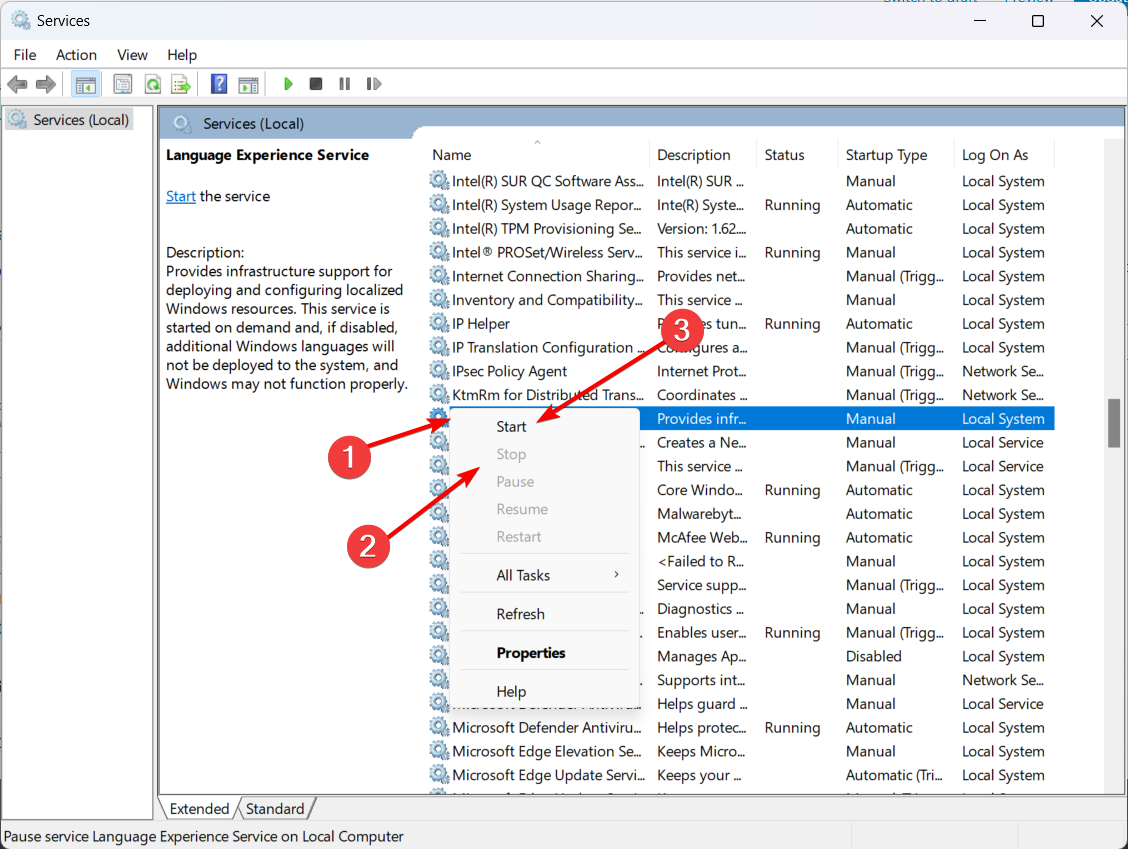
This restarts the LGHUB Updater Services. Now, reopen Logitech G Hub to see if it functions correctly.
6. Reinstall Drivers
Old driver files can conflict with the newer versions, reinstalling drivers will delete the previous driver files and install fresh drivers which can fix this issue.
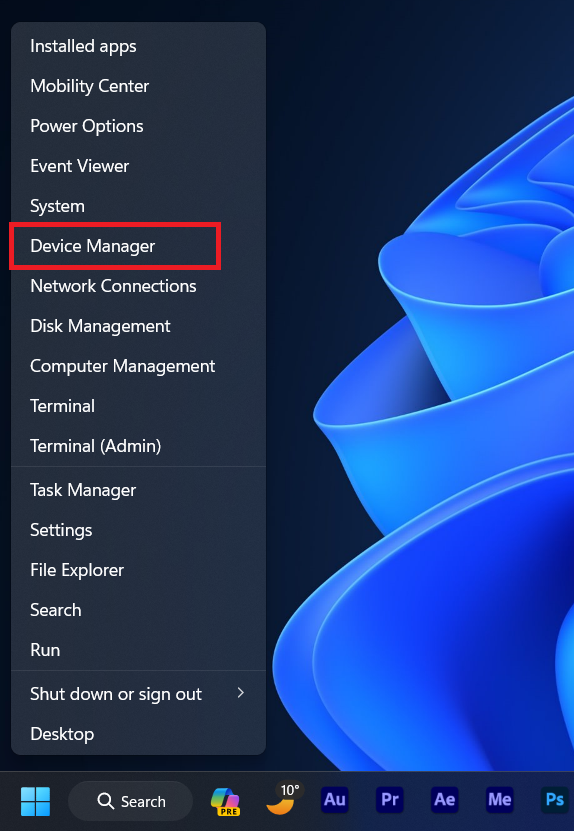
- Right-click on the Start button and select Device Manager.
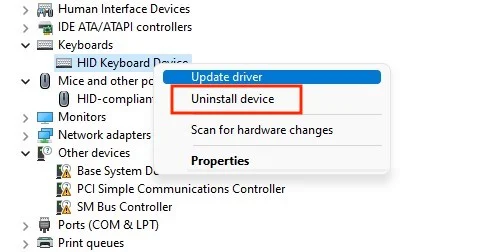
- Double-click on the device category. Right-click on the device and select Uninstall device.
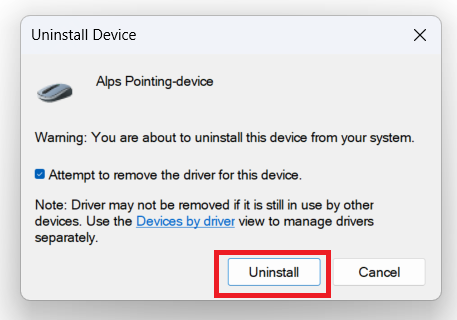
- In the confirmation box, click Uninstall.
- Restart your computer.
- Upon reboot, open the Task Manager again.
- Click on your computer’s name at the top, right-click on it, and select Scan for hardware changes.
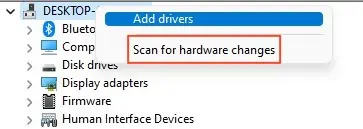
- Windows will automatically search for drivers and reinstall them.
7. Reinstall Logitech G Hub
If none of the previous solutions work, it may be necessary to reinstall the G Hub application:
- Press Windows + I to open Settings.
- Navigate to Apps, then click on Apps & Features.
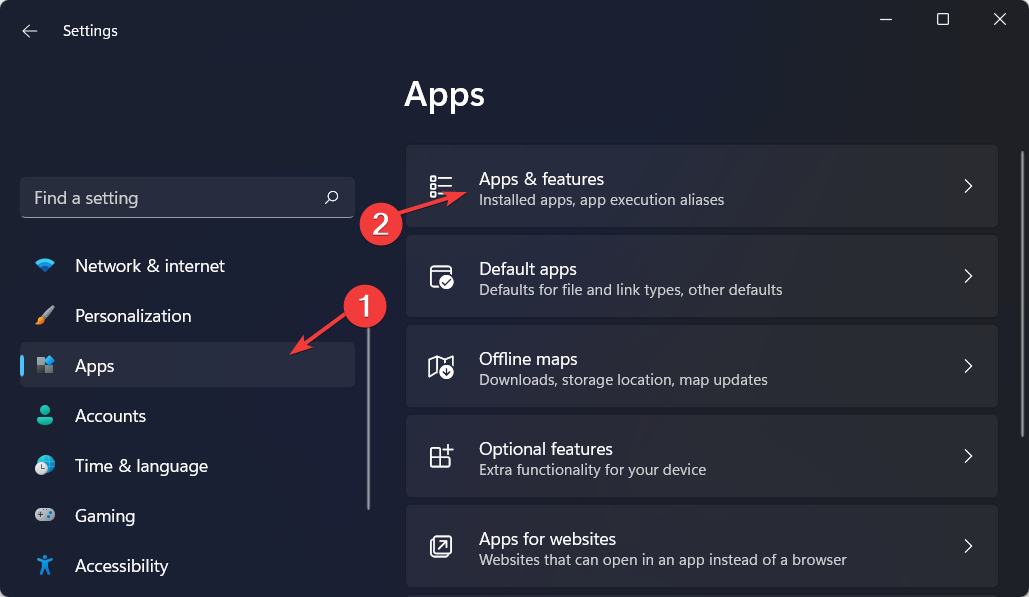
- Locate Logitech G Hub.
- Click on the three dots on the right side and select Uninstall.
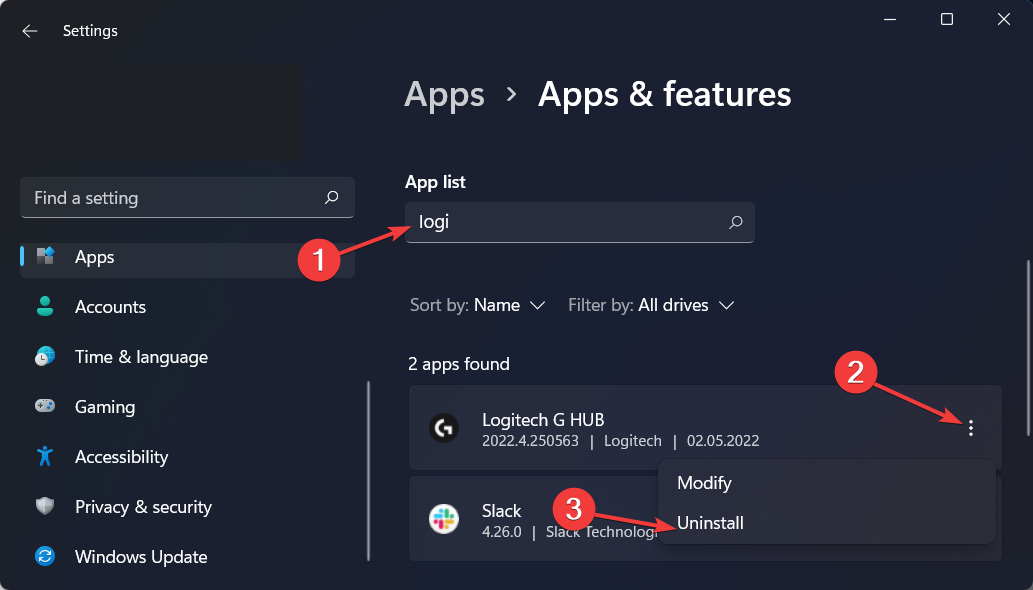
- After uninstalling, visit the Official Logitech G Hub Website and download the software for Windows.
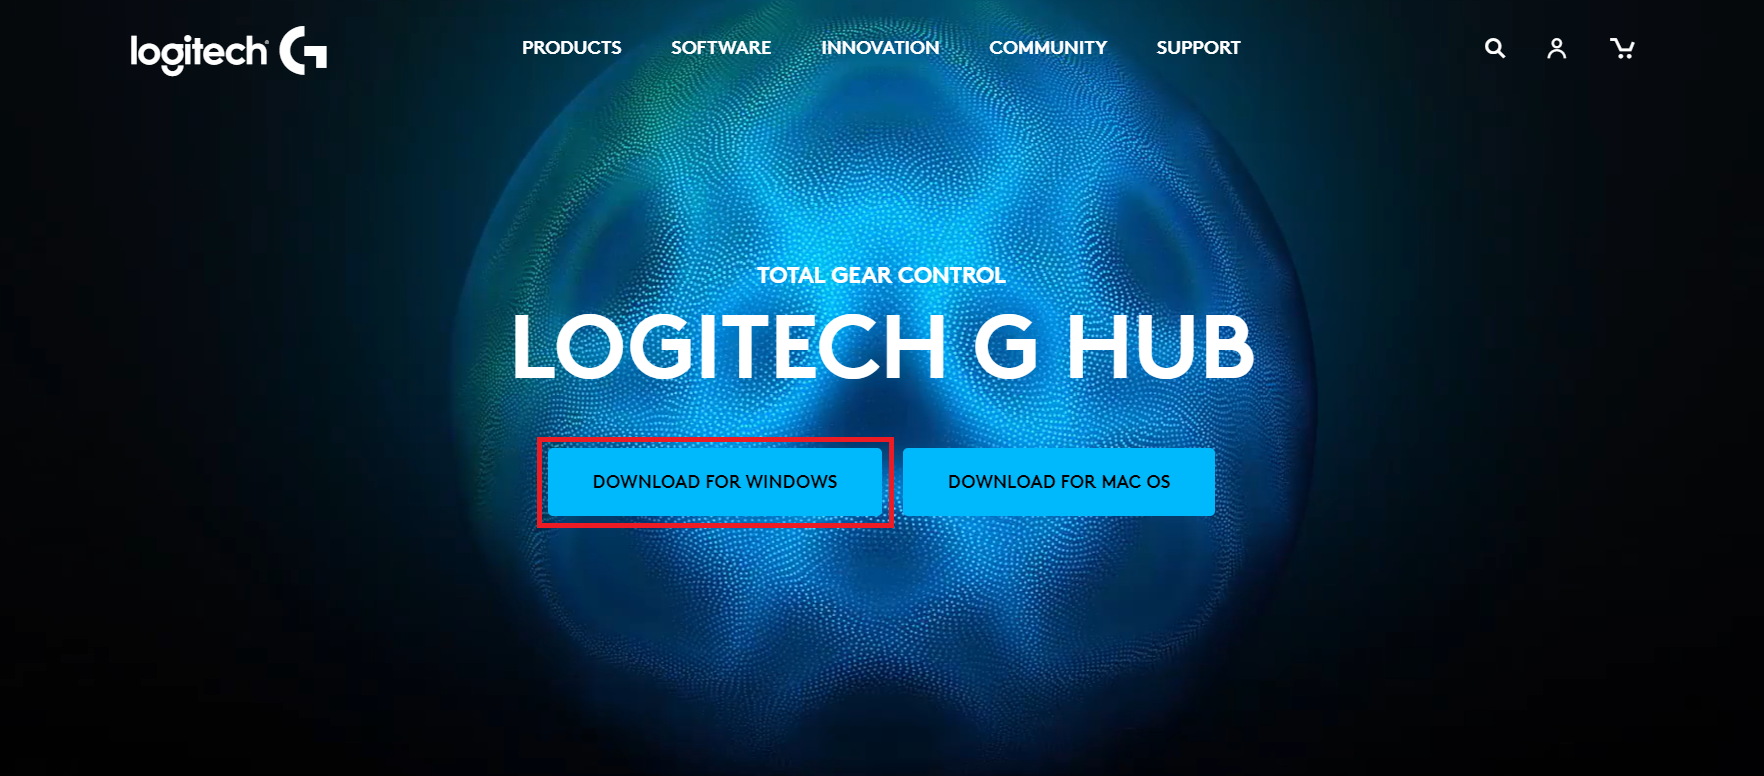
- Complete the download process and install G Hub. This should rectify the problem.

