How do I reset my Android’s network settings? and Why should I?
In this article, we will explore the reasons why you may need to reset your network settings on your Android device, and will provide step-by-step instructions on how to do so. Whether you’re experiencing connectivity issues or simply want to start afresh with your network settings, this guide will walk you through the process of resetting them.
Reasons to Reset Network Settings
There are several potential reasons to reset your network settings on your Android device. Some of the most common reasons include:
- If you’re experiencing problems with your internet connection, such as slow speeds or dropped connections, resetting your network settings may help resolve these issues.
- If the password for a Wi-Fi network has been changed and you can’t connect to this network any longer, resetting network settings will allow you to re-enter the password and reconnect to the network.
- If you are having any local network issues, like your sim card not picking network, resetting the network settings can help re-establish strong connections.
- If you’re moving to a new location or want to change your network settings, resetting mobile network settings can be helpful to remove all old networks and connect to the new ones.
- Sometimes bugs or viruses can cause malfunctioning of the network settings and resetting them can be a solution to that.
Note: Resetting your network settings will remove all previously connected Wi-Fi networks and their passwords, Bluetooth pairing, VPN connections, and local networks, so make sure to save them before proceeding.
Precautions before you Reset Network Settings
- Before resetting network settings on your Android device, it’s important to take the following precautions to ensure that you don’t lose any important data or settings.
- Before resetting your network settings, make sure to back up any important files, photos, or other information that you don’t want to lose. This can be done by using a cloud storage service or by transferring files to a computer or external hard drive.
- If you have previously connected to Wi-Fi networks, make notes of the passwords for these networks. Resetting your network settings will remove all previously connected networks and their passwords, so you’ll need to re-enter them after the reset.
- Make sure you have the login credentials for the accounts you use like email, social media, etc. This will be helpful after resetting network settings so that you can log in to your accounts again.
- If you are using a VPN service, disable it before resetting the network settings.
- Check if your device is running on the latest software version, if not, update it before resetting network settings.
- If you are using a carrier plan, check the carrier’s instructions before resetting the network settings, to avoid any issues with your plan.
Step-by-Step Guide to Reset Network Setting on Your Android Phone
To reset network settings on an Android device, you can follow these steps:
- Open the Settings app on your device.
- Scroll down and click on the System or General management option.
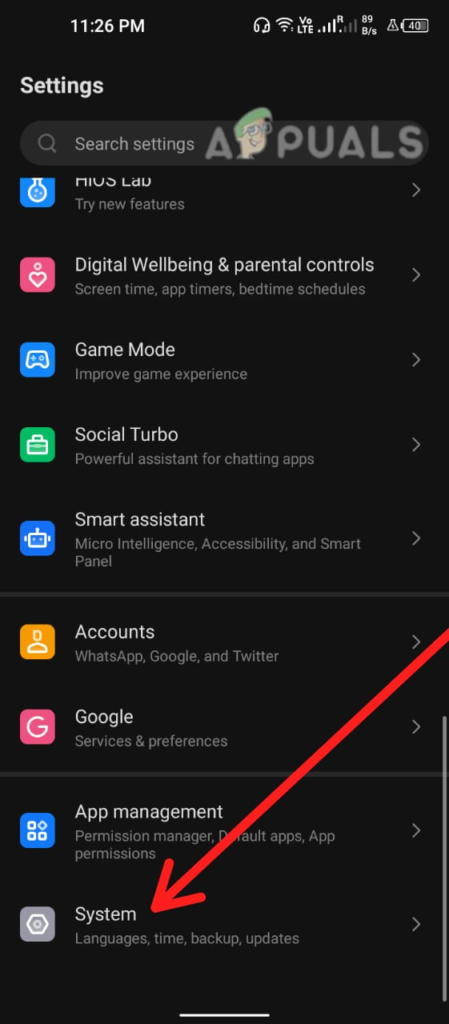
In Settings, go to System - Tap on the Reset options.
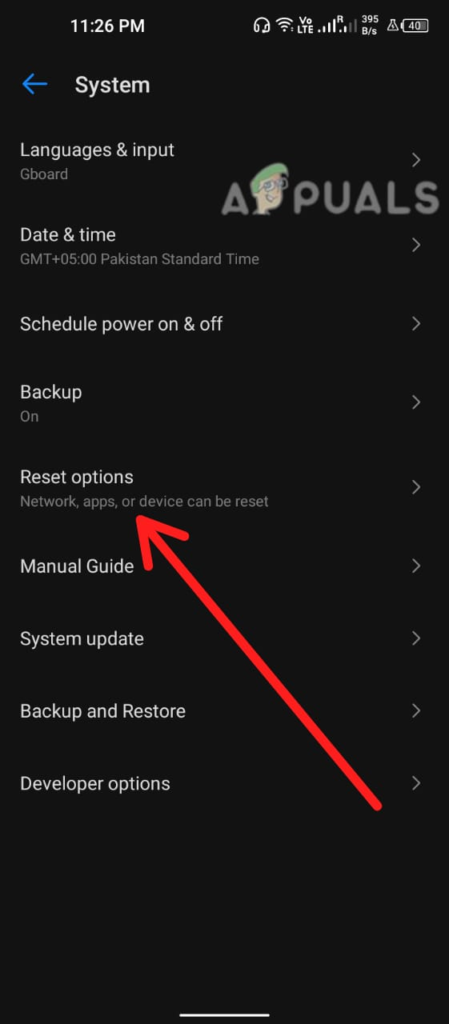
Tap on the Reset options - Select Reset network settings or Reset Wi-Fi, mobile & Bluetooth.
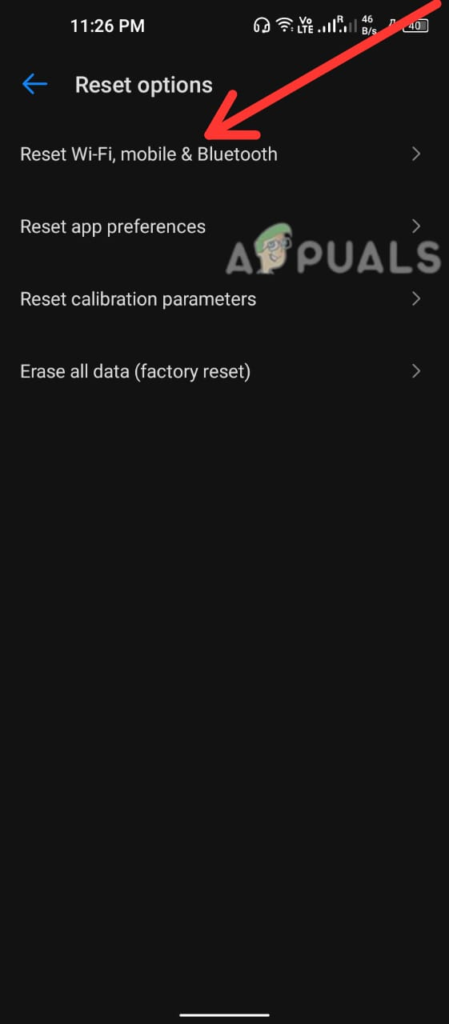
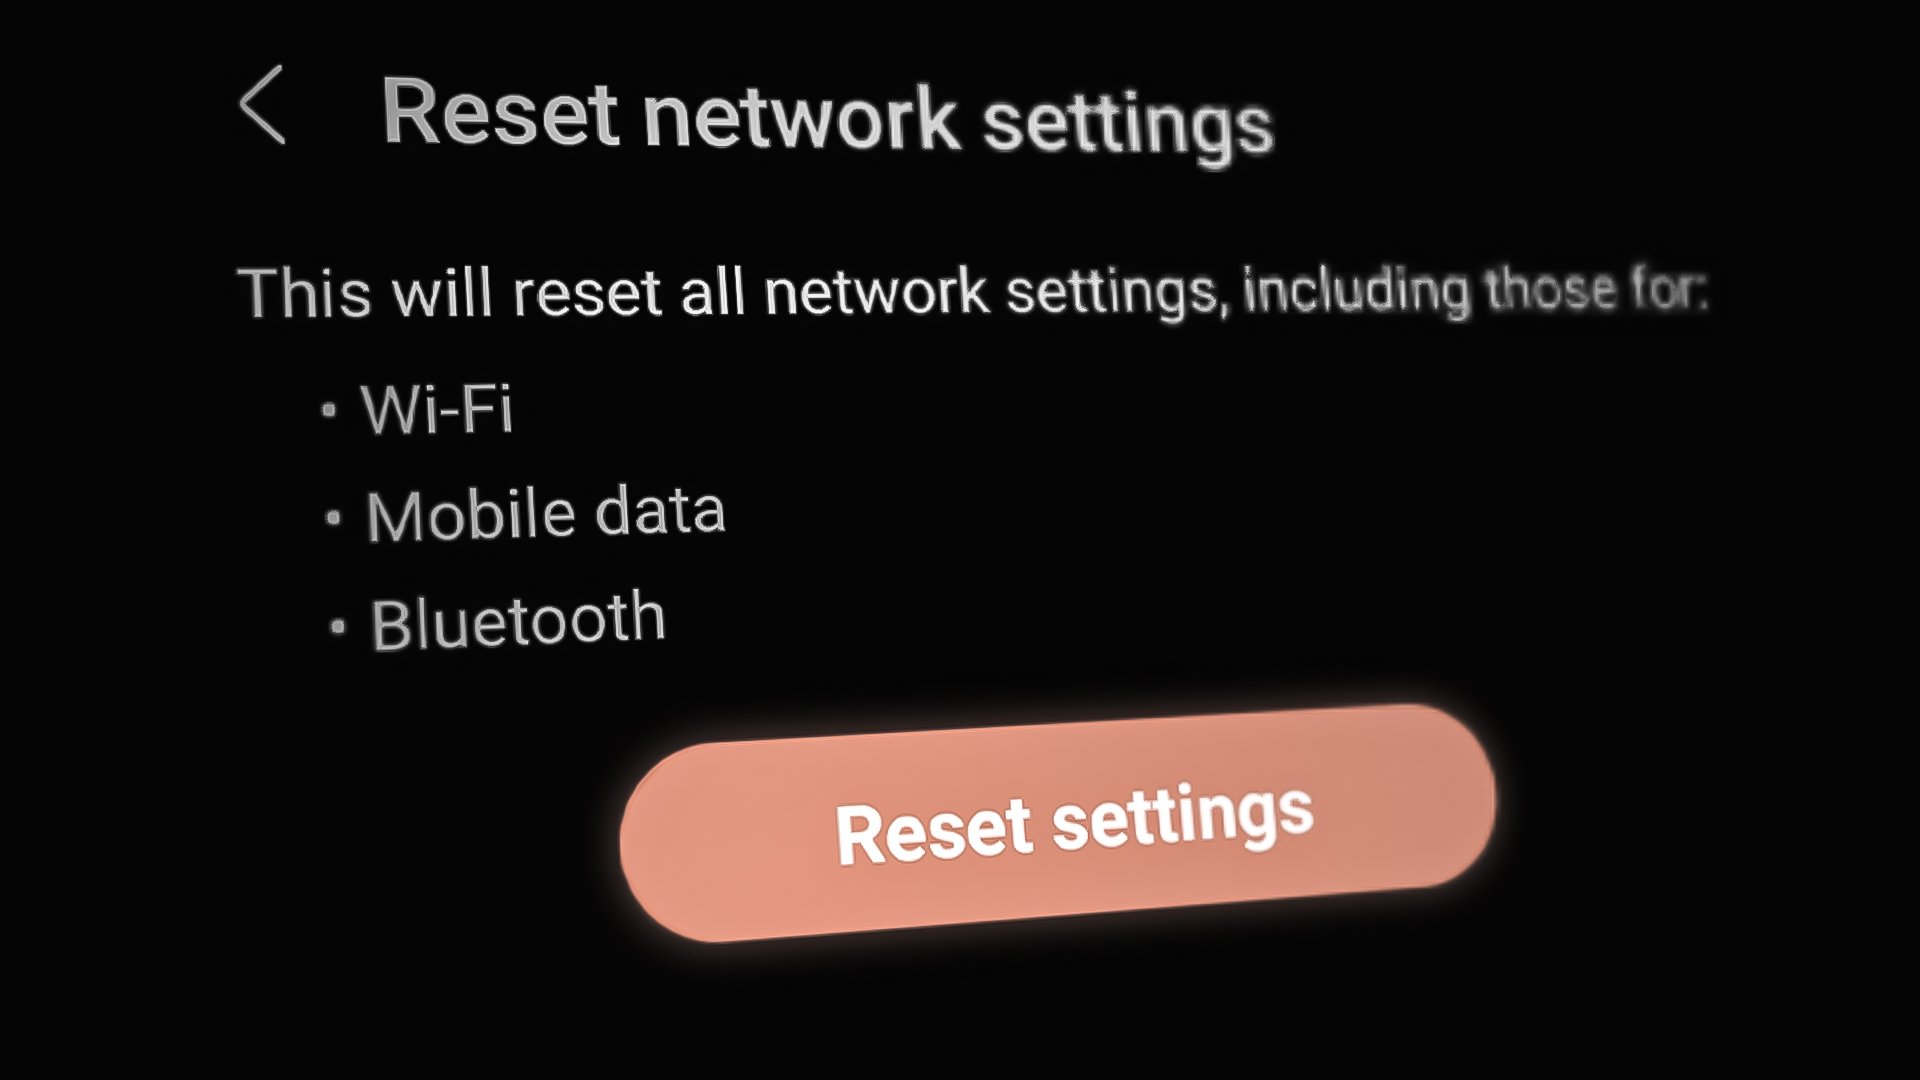
Tap on Reset Wifi, Mobile, and Bluetooth - A warning message will appear, reminding you that resetting your network settings will remove all previously connected Wi-Fi networks and their passwords, and any other network settings you have configured. If you’re sure you want to proceed, tap on Reset settings.
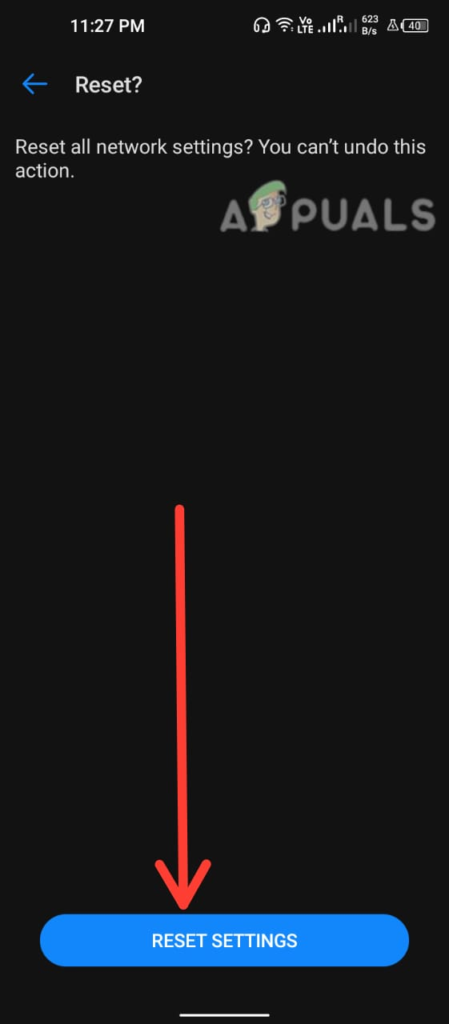
Hit the Reset Settings button
Your device may ask you for your screen lock passcode or fingerprint, enter it. Now, your network settings will reset. After the reset, you’ll need to set up your Wi-Fi and cellular connections again.
Note: Depending on the Android device and version you’re using, the exact steps to reset network settings may vary. If you’re having trouble finding the option to reset network settings, consult your device’s user manual or do a quick Google search for instructions to reset your device.
If you are facing any connectivity issues, resetting the network setting will solve the problem. However, if you are still facing the issue, contact your network service provider or mobile production company for further assistance.


